Last week, we took a look at what Jira was, as well as the different options you could get Jira in. And well, you guys seemed to like that. However, I did want to take a moment and address the most popular comment. I had several people comment last week that “Jira isn’t a project management system; it is a workflow management/task management/helpdesk system.” And well, the answer to this is: Yes. It is flexible enough to be configured as a Project Management system, a Workflow management system, a Task Management System, a Helpdesk, or all of the above in one instance! However, I still stand by the fact that I am most often contacted about the Project Management use case. It may not be how you are using Jira, but that doesn’t make it wrong.
Anyways, today I wanted to look at Jira from a beginner’s standpoint and help people take their first tentative steps into Jira. Given how similar they operate, I will focus on the most basic functionality (What was known as “Jira Core”). I intend to talk about Jira Service Management, Jira Work Management, and Jira Software, but I feel those topics would be better served by making that its own article. So, let’s dig into this!
Basic Jira Terminology
I usually begin any talk with a new user to Jira with a talk about basic terminology. After all, if you want to teach someone, it helps if you speak the same language. Given how deep the customization rabbit hole can go, I will discuss overall objects or items you would find on a default configuration and try not to get lost in the weeds.
Issue
An issue is where this all starts. It is an individual work item – something that needs doing. All issues in Jira are issued an Issue Key, consisting of the Project’s Abbreviation (Known as a Project Key), followed by a number that uniquely identifies it within that Project.
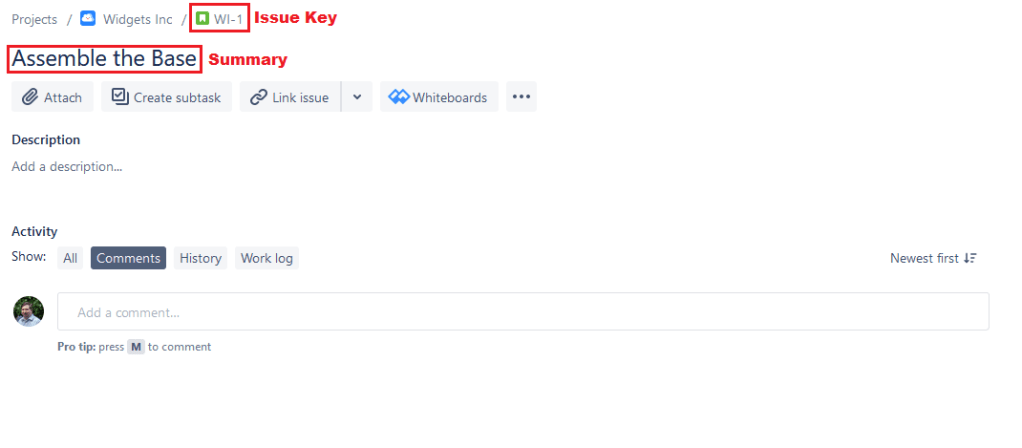
You can create an Issue from almost anywhere in Jira by clicking the giant “Create” button at the top of Jira. Honestly, you will be surprised how often users manage to miss that. Clicking that button will open up an Issue Create Screen. The Absolute minimum you need to create an Issue is a Project, an Issue Type that describes, in broad terms, the scale and purpose of this Issue, and a Summary that briefly describes What is to be done.

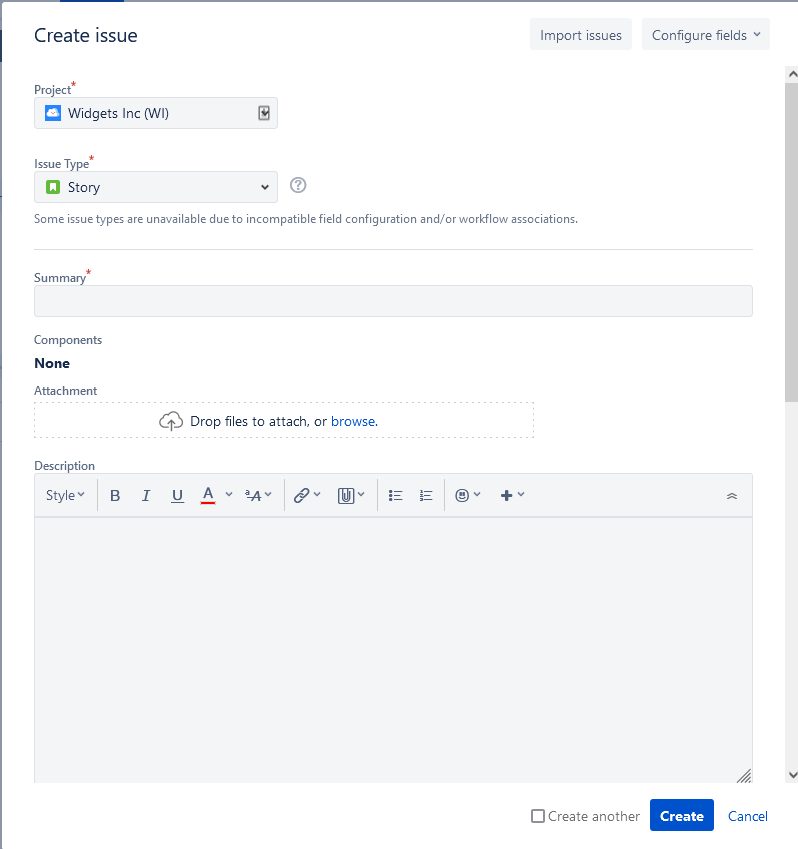
While the minimum you need to create an issue is a Project, Summary, and Issue Type, keep in mind that your Project Admins and/or Jira Admins might have set other fields to be mandatory.
In conjunction with the various Project settings your Jira Admin has set up, the Issue Type will determine the Workflow your Issue will use, what fields are available to your Issue, and how your Issue relates to other issues within both the Project and the broader Jira instance.
In speaking of Workflows…
Workflow
A workflow is the list of discrete steps (and the pathways between those steps) your Issue takes towards Resolution – or completing.
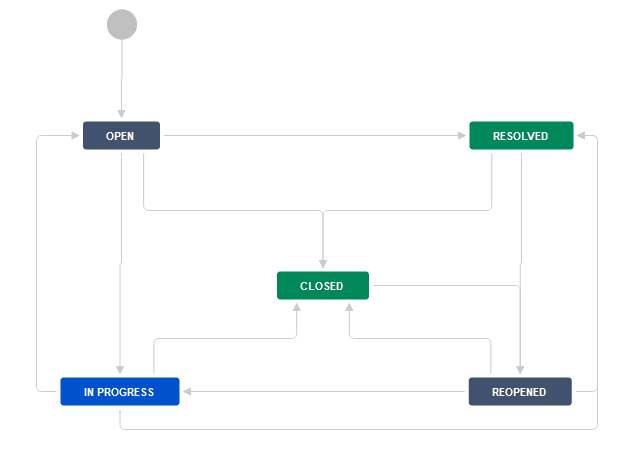
Each of the discrete steps is called a Status, and as the name would suggest, it is meant to describe the “state” of the Issue. Each of the Arrows between each Status is called a transition and represents which new statuses an issue can go to from its current status. You will see what statuses are available to transition to as either buttons at the top of each Issue or a Dropdown. Clicking on the Button or Dropdown option will move your Issue through that transition to its resulting workflow.
Fields
On top of a workflow, each Issue has a collection of information associated with it. Each of these pieces of information is called a Field. Fields are – in general – divided into two types. The first are the fields that are built into Jira, called System Fields. You can find these fields on every Jira instance, even if some are hidden inside your specific Project. They include, but are not limited to:
- Summary
- Description
- Issue Type (Yes, it counts as a field!)
- Priority
- Resolution
- Affects Version(s)
- Fix Version(s)
- Component(s)
- Labels
- Environments
- Linked Issues
- Attachments
- Assignee
- Reporter
- Due Date
- Time Tracking
- Security Level
The other type of Field is a Custom Field. These Fields are set up on your Jira Instance either by your Jira Admin or by Add-ons (called Apps). Therefore, it would not be easy to find any two Jira instances with the same set of Custom fields. However, Custom Fields have different types that allow the Jira Admin to specify the kind of data that goes into them. A few examples of these types are:
- Dropdown
- Date
- Number
- Checkboxes
- Radio Buttons
- Number Fields
- Text Fields
- User Selector
Project
Now that we understand Issues, Workflows, and Fields, we can start with the Project. A Project is a collection of Issues and the settings that determine how those issues behave. Unfortunately, I have seen people take the name Project literally and open up a New Project for every initiative their company undertakes. While certainly not wrong, it does seem to be a bit wasteful to throw away Projects when you are done.
As a Jira Admin, I like to set up a Jira Instance so that each team has a home Project and guide them to use things like Epics and Versions to define their initiatives.
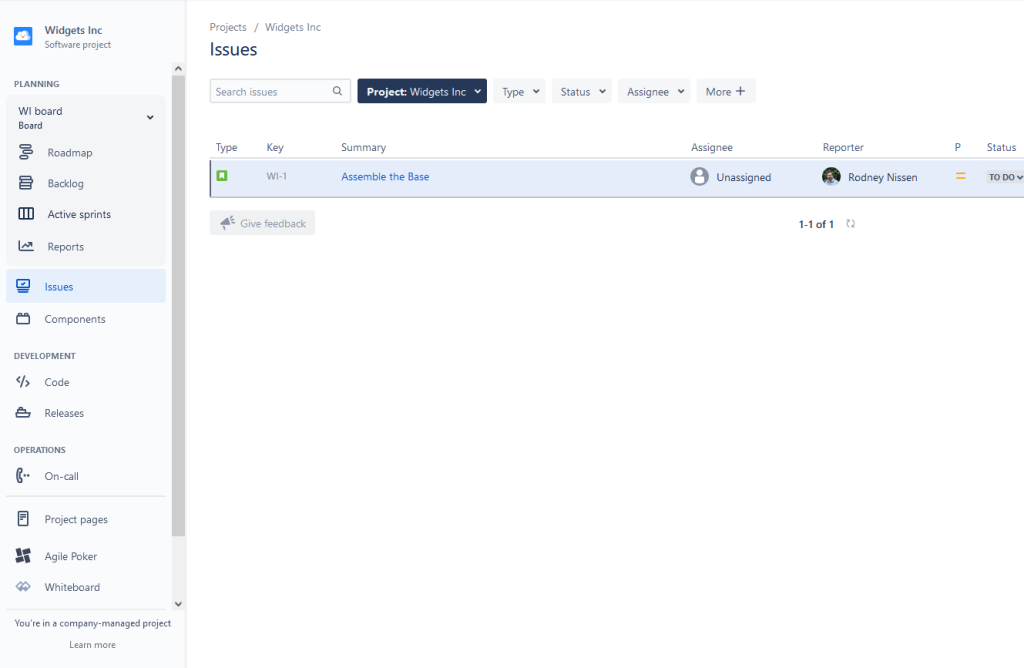
Each Project will have a Project Key or an abbreviation of the Project. In the example, Widgets Inc becomes WI. The Project Key will prepend every Issue Key for all issues in that Project, so the Issue Keys for WI will be WI-1, WI-2,…, WI-(n). For this reason, I usually recommend that Project Keys be no longer than five characters, with the sweet spot being around 2 or 3.
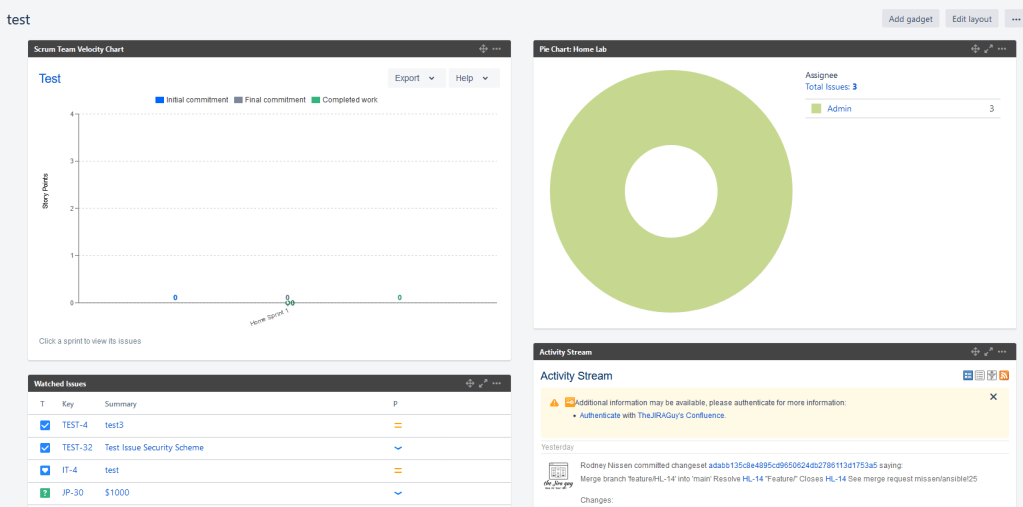
Dashboard
A Dashboard is a mechanism to help you collate, organize, and understand the data stored within the Issues and can help both you and your team understand where you’ve been, where you are, and what you need to do to achieve your goal. As a part of this series, I intend to discuss setting up both Dashboards and the filters that power them as a separate article.
Finding your first Jira Issues
So, now that we have some of the same language, I want to discuss how you get around in Jira. Navigation is the number one complaint I hear from new users of Jira, and it’s not without merit. However, if you are not familiar with the system, finding what you need is a bit daunting.
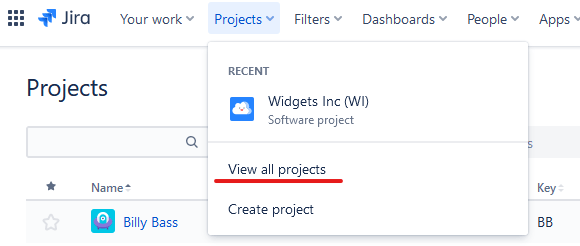
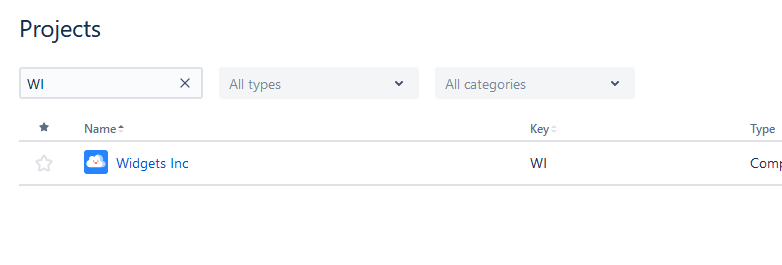
The first thing I would recommend you do is to find your “Home Project.” This is the Project your team is currently working on. Go to Projects -> View all projects. Doing this will take you to a listing of all projects you can see.
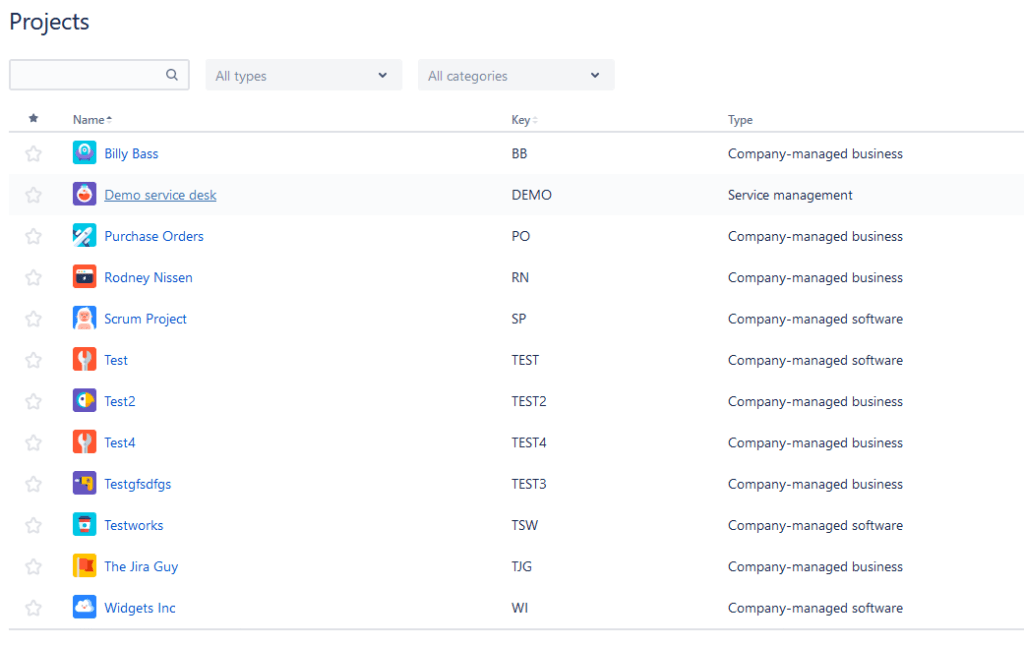
Either your teammates or Manager should be able to give you the project name or project key. Enter that into the Search Menu to narrow it down to your Home Project. Then, click on its name to navigate to the Project.
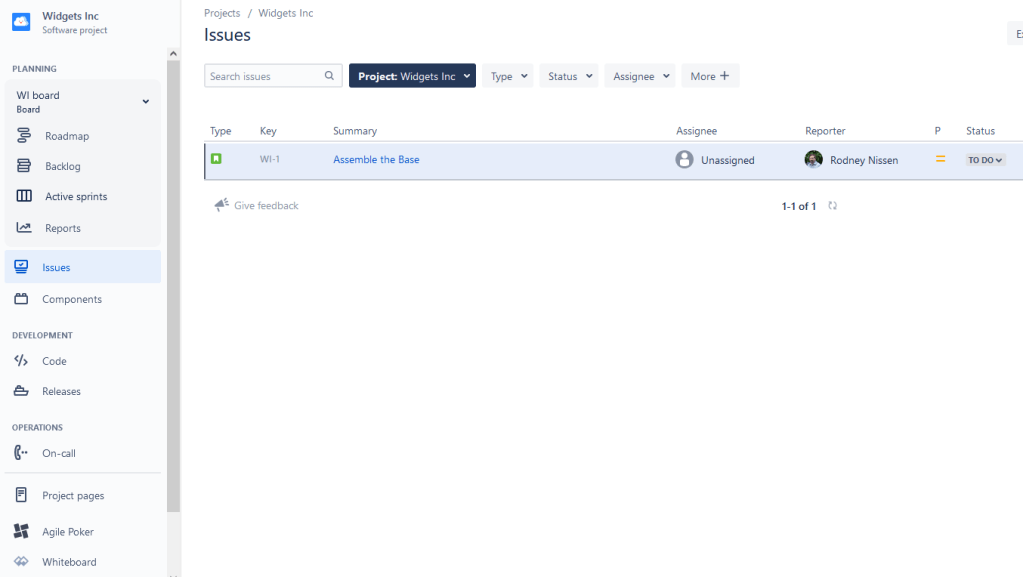
Now you will see the Project View. Your options on the left-hand sidebar will vary depending on how the Project is set up. However, every Project will have a button called “Issues.” Click on that to see Issues in your Project. You can narrow down this list by clicking the various options above the list of Issues. In a future article, we will cover JQL, a powerful tool for sorting and filtering Issues.
How does it feel?
Congratulations! You have taken your first tentative steps into Jira! I intend to do a much deeper dive into how to use Jira to its fullest from a User’s perspective, so as I’ve mentioned, there will be more lessons to come!
Don’t forget that you can find me on Facebook, Twitter, LinkedIn, and Instagram. Be sure to follow me for the latest from the blog, any exciting announcements (More than a few things are in the works 😉 ), and news from the Atlassian Ecosystem. Don’t forget to to also subscribe to the blog to get the latest posts delivered right to your inbox! Sign up is below! But until next time, have you updated your Jira issues today?
Discover more from The Jira Guy
Subscribe to get the latest posts sent to your email.
