Happy Wednesday, Jira Guys and Gals! I hope you are doing well this week! So, we all know that SSL isn’t optional if we run our own Jira instance. The most popular method – and the one Atlassian emphatically recommends – is to run a proxy service to handle SSL translation on the same machine as the Jira system. This is usually either Nginx or Apache, and this is because both of these applications are optimized for SSL translation, and Jira is, well, not. There might be some concern about someone sniffing packets between the proxy service and Jira, but to be honest, a hacker would have to already be on the box, and if they are, you’ve already lost the game.
But, policies and regulations rarely take into account the real world. And sometimes, said policies and regulations require you to terminate SSL with the service. So we are going to take today and review how you’d go about this and what all you’d need. Let’s dig into this!
Know before you go
So – the first thing to know about hosting SSL this way is that Atlassian will not support your SSL reconfiguration. They explicitly state that they will ask you to go to your Certificate Authority for instructions on how to configure the SSL. I suspect you already know this, so you are here now trying to find out how to do this or what you are doing wrong. Welcome! If you are running a reverse proxy, these instructions are usually fairly easy to find from your CA, but if you are trying to run SSL directly in Jira, yeah, not likely. If you are lucky, you might find instructions for hosting it in Tomcat, which should get you close, but even then, you might not have everything.
Another thing to note is Jira will not run natively on ports 80 or 443. If you insist on running on those ports and not using a reverse proxy, you will have to resort to IPtables chicanery. Here is a guide on how to do that. However, having done this early in my career, you need to be careful, as I’ve caused some weird problems with misconfigured iptables. You’ve been warned.
Also, there are two bugs that are impacting your config in the server.xml file. Atlassian has a workaround for it, which I’ll include in these instructions, but it’s something you should be aware of:
Now – I’m more comfortable running a server via the command line, so I’ll be doing so for this post. This is on a Jira 9.8.1 system running on Ubuntu Linux. Because it does matter, I’ll also be running OpenJDK 11 on this system. I’ll also be using the certificate and private key provided to me by Let’s Encrypt. Typically you’d want to get a paid certificate from a CA for production – as they tend to last MUCH longer, but the process will be the same for both.
To make it easier, I have to following environment variables set up:
- $JAVA_HOME = /usr/lib/jvm/java-11-openjdk-amd64
- $Jira_HOME = /var/atlassian/application-data/jira
- $Jira_INSTALL=/opt/atlassian/jira
You can set these up for your local environment (for this session) by using the following code:
export JAVA_HOME=<your JDK home>
export Jira_HOME=<your Jira home>
export Jira_INSTALL=<your Jira install>
This should make all commands copy/pastable.
And the last thing you need before we get started is, as always, the documentation.
Setting Up the Keystore
The first thing we need to do is set up the Keystore. We can do this with the following command:
$JAVA_HOME/keytool -genkey -alias jira -keyalg RSA -keystore $Jira_HOME/jira.jksYou should note that your keytool may not be found at $JAVA_HOME – mine was found in the bin folder, meaning I could forget the “$JAVA_HOME/” part and just type keytool (see below).
First, it will ask for a password, then repeat it to try to catch typos. It will then ask for your name. Instead of your First and last name, enter the URL for the system minus the protocol (https://). Enter the rest of the info as you see fit. For example, here’s mine.

Getting and Importing a Certificate with a CSR
The next step is optional – if you already have your certificate, you don’t need to make a CSR or Certificate Signing Request. But if you need one, you will use the keytool with the certreq argument to generate a CSR.
$JAVA_HOME/keytool -certreq -alias jira -file ~/csr.txt -keystore $Jira_HOME/jira.jksI have the output file for this command going to my Linux home directory, as seen below.

I would take this CSR file and send it to my Certificate Authority, who will sign it and send me a certificate. I should note that by doing this, your private key is already in your keystore, so all you should need to do is import your certificate, starting with the Root and Intermediate CA certificates, more commonly known as a chain.
$JAVA_HOME/keytool -import -alias rootCA -keystore $Jira_HOME/jira.jks -trustcacerts -file root.crt
$JAVA_HOME/keytool -import -alias intermediateCA -keystore $Jira_HOME/jira.jks -trustcacerts -file intermediate.crt
Once you have your Intermediates, you can import your certificate.
$JAVA_HOME/keytool -import -alias jira -keystore $Jira_HOME/jira.jks -file jira.crtImporting an existing Certificate/Key combo
So – if you, like me, already have a certificate you will be importing, welcome. We’ll start as before with importing your chain – these don’t require private keys, so we can handle them directly.
$JAVA_HOME/keytool -import -alias rootCA -keystore $Jira_HOME/jira.jks -trustcacerts -file root.crt
$JAVA_HOME/keytool -import -alias intermediateCA -keystore $Jira_HOME/jira.jks -trustcacerts -file intermediate.crt
If you find, like me, that your root is already in the keystone, cool! No need to reimport it! Just hit no and move on to the next cert.
Next we need to prepare the certificate for import – which means we need to pair it with its private key. We’ll be using OpenSSL to do this with the following command:
openssl pkcs12 -export -in import.pem -inkey myhost.key -name jira > server.p12
It will ask you for a password for this – make sure it’s something you can remember, as we’ll need it shortly. Now that we have the p12 file let’s import it into the keystore.
$JAVA_HOME/keytool -importkeystore -srckeystore server.p12 -srcstoretype pkcs12 -destkeystore $Jira_HOME/jira.jks -srcstorepass <pass from previous step> -deststorepass <java keystore pass>
Verify the Keystore
Now that we have our cert in the keystore via a CSR or one we already had let’s verify it’s good to go. We can do this with the following command:
$JAVA_HOME/keytool -list -alias jira -keystore $Jira_HOME/jira.jks
If you see something like the above, we are good to move on!
Updating Jira with the Keystore
Before we begin, make sure Jira is stopped for this operation
systemctl stop jiraOnce Jira is stopped, we’ll take a backup of $Jira_INSTALL/conf/server.xml
cd $Jira_INSTALL/conf
cp server.xml ~/server.bck
Then we’ll open up server.xml with the text editor of our choice. Once inside, we’ll add the following block at the same level as the existing connector:
<Connector relaxedPathChars="[]|"
relaxedQueryChars="[]|{}^\`"<>" port="8443" protocol="org.apache.coyote.http11.Http11NioProtocol"
maxHttpHeaderSize="8192" SSLEnabled="true"
maxThreads="150" minSpareThreads="25"
enableLookups="false" disableUploadTimeout="true"
acceptCount="100" scheme="https" secure="true"
sslEnabledProtocols="TLSv1.2,TLSv1.3"
clientAuth="false" useBodyEncodingForURI="true"
keyAlias="jira" keystoreFile="<Jira_HOME>/jira.jks" keystorePass="changeit" keystoreType="JKS"/>Be sure to update <Jira_HOME> with your actual home and the keystorePass with your actual keystore password.
We’ll then modify the existing connector to serve as a redirect from port 8080 to port 8443.
<Connector relaxedPathChars="[]|"
relaxedQueryChars="[]|{}^\`"<>" acceptCount="100" connectionTimeout="20000" disableUploadTimeout="true" enableLookups="false" maxHttpHeaderSize="8192" maxThreads="150" minSpareThreads="25" port="8080" protocol="HTTP/1.1" redirectPort="8443" useBodyEncodingForURI="true"/>When you’re done, it should look like below:

Save the file and close it. A note here, though. If you are going to be using iptables to forward ports 80 and 443 to 8080 and 8443, you will need to adjust the appropriate ports in your connectors before starting Jira.
We’ll next open $Jira_INSTALL/atlassian-jira/WEB-INF/web.xml. I should note Atlassian’s official docs make a mistake here, saying the file should be in $Jira_INSTALL/WEB-INF/web.xml. That is wrong,
cd $Jira_INSTALL/atlassian-jira/WEB-INF/
nano web.xml
This is a rather long file; we are looking for the last line, which should be </web-app>. Right before that tag, we are adding the following.
<security-constraint>
	<web-resource-collection>
		<web-resource-name>all-except-attachments</web-resource-name>
		<url-pattern>*.jsp</url-pattern>
		<url-pattern>*.jspa</url-pattern>
		<url-pattern>/browse/*</url-pattern>
		<url-pattern>/issues/*</url-pattern>
	</web-resource-collection>
	<user-data-constraint>
		<transport-guarantee>CONFIDENTIAL</transport-guarantee>
	</user-data-constraint>
</security-constraint>
Be sure to adjust your tabs as necessary so that everything lines up. It doesn’t really matter, it just makes me feel better…

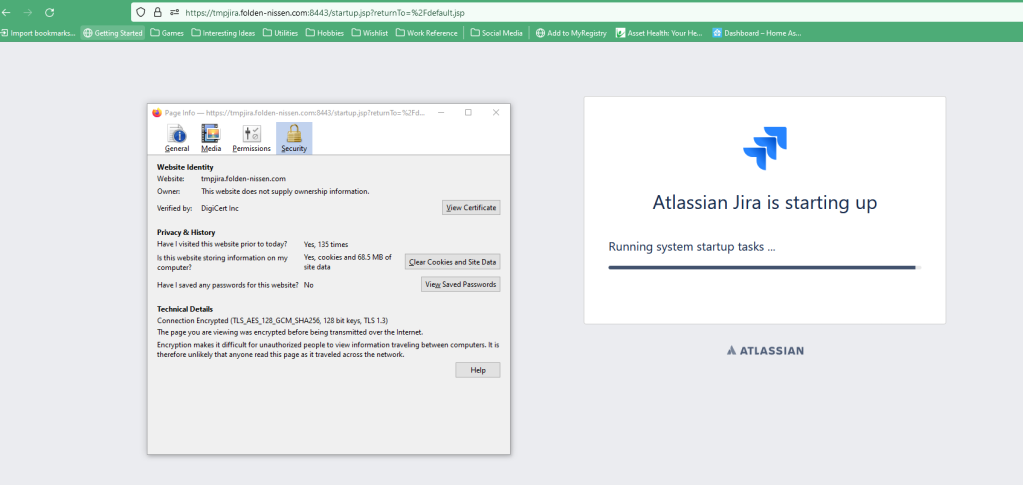
Save this file too, and restart Jira. Once it’s up, test it, and make sure it’s all working. I missed the leading / on the keystore location in my server.xml file, which I found out by following the $Jira_INSTALL/logs/catalina.out file. But, after that minor correction:

So, what do you think?
I’ll say this, headaches like this are one reason I do like Cloud. But this did finally push me to get a CA-signed wildcard cert, so there is that. I won’t have to worry about expiring certs for a while.
What sort of challenges are you experiencing in your on-premise instance? Today’s topic was actually inspired by a question I got, so maybe I can help more people!
If you haven’t, please subscribe to The Jira Life podcast, a new collaborative effort between myself and Alex Ortiz! We are so close to our next goal of 250 subscribers, all towards our ultimate goal of getting 1000 subs by the end of summer! Not a youtube kind of person? You can catch it on Spotify, iTunes, Amazon, or wherever you get your podcasts. All the links will be in my linktree. This week we’ll be reviewing some Jira fails your fellow admins have submitted! We’ll be recording live tomorrow and every Thursday at 5 PM Eastern/2 PM Pacific.
You can also catch me on social media! You can find all my links on Linktree, so please follow, like, comment and share the posts!
But until next time, my name is Rodney, asking, “Have you updated your Jira issues today?”

In my opinion, this should basicly never be done, and just gives extra hassle.
Putting an Apache, ngix or HAProxy in front is what to do, – dont get me wrong – technically theres nothing wrong with it, but its does require 1) N number of restarts extra (also if You make typo’s and 2) Extra work on each upgrade and 3) A little annoying on windows, as openssl/keytool are not (native available)….
Also, an Apache, ngix or HAProxy in front gives the possibility to use rewrite or redirect of URLs…and some catch of “jira server not responding – redirect nicely to error page”. And finially, simple http->https redirect.
PS : Dont forget to forward the source Ip….
If You have “some concern about someone sniffing packets between the proxy service and Jira” – You problably got other problems…
LikeLike