
So, last week we took a look at the process to install MySQL to a server, and set it up to work with JIRA. I’d like to keep the momentum up with the actual JIRA install. Although this will feel like a lot of steps, I can usually do a DB and JIRA install in about an hour. It’s exhausting, but possible.

This isn’t a race though. Unless I have reason to rush, I’ll still take my time, double check each step, and use a checklist to make sure I’m not missing any steps. An ounce of prevention is worth a pound of cure, after all. So, lets get started!
Planning
The first question you should have in mind is your target version. Technically, you should have considered this first as it will impact what Databases and platforms are compatible, but I had already decided that I would be targeting Version 8.1.X – mainly because I already had it downloaded!
The first place I like to look when deciding a target version for an install or an upgrade is the Atlassian JIRA release notes. This will give you all the details about what versions are released, and what new features and bug fixes were included in that release. I love how Atlassian does their release notes. One of my biggest pet peeves is when a company has “Generic bug fixes” as their release notes – I mean my job is to manage a system to tell you exactly what you fixed!
Second thing I consider is also a bit of advice I’ll give to any admins out there. As a personal policy, I never install a version that ends in “0”. If it has two zeros, the policy stands doubly so. Nothing against Atlassian, they make comparatively good software.
However, I’ve worked with software companies, and remember the mad rush that follows any software release ending in zero. There are always bugs, and a dash to fix them. It’s also, incidentally, why I put a blackout window a month before through two weeks after any software release, where no changes to JIRA or Confluence are allowed.
Directory Layout
Now that you’ve have a target in mind, comes the next step. JIRA has two main directories on the file system it cares about, the Install Directory and the Home Directory. Took me forever to understand the difference, and what does what. However, it’s a good thing to learn now, as it will save you a good bit of time in hunting down problems.
Install Directory
The Install directory is where the files that make JIRA run live. With the exception of two or three configuration files, you should not modify anything in here. And if you do, be sure to follow Atlassian’s documentation.
You will typically find this directory at /opt/atlassian/jira, and this one I suggest keeping to the default location.
Home Directory
Unlike the Install Directory, JIRA’s home directory is where everything that makes your JIRA instance unique lives. Here you will find details about how JIRA connects to the Database, any saved attachments, log files, exports, and the Index.
That is why I like to keep it on a separate drive. Considering what all is stored in the JIRA Home Directory, it will grow considerably over your instances lifetime. It is also important that you have it on the fastest hardware you can afford. The speed at which JIRA can access it’s index will have a significant impact on both re-indexing times and JIRA’s performance overall.
By default, you can find the JIRA home at ‘/var/atlassian/application-data/jira’. However, if you have installed it in another location, you can use the command below to find where it is (assuming you know where the JIRA install directory is).
cat <jira_install_dir>/atlassian-jira/WEB-INF/classes/jira-application.properties | grep "jira.home = " | cut -d ' ' -f 3 | tr -d '\r'Documents…always with the Documents
If you haven’t realized it yet, there is a lot of reading in being an admin. This week we are going to be looking at two documents: one new one and one returning one.
Our first document is Atlassian’s guide to installing JIRA on Linux. It includes a checklist of things to check before you install, and a rundown of how to do it. For this I will be using the Installer, and installing it as a service.
You can also do an install from a tar.gz archive, but this is a more intense process, and honestly one I find more ideal for automated installations and upgrades than something for a human to do. There are people who will swear by it, and in fact sometimes there’s some bug in Linux or the installer that forces you to consider an archive install, but whenever possible I’d rather not complicate things. “Keep it stupid simple” was something my engineering professors would chant whenever possible.
Our next document is the Atlassian MySQL document from last week. Eagle-eyed Admins would have noticed that I missed a step of that doc last week. This was intentional, as you cannot complete this step until you’ve installed JIRA, so we’ll be revisiting that when the time comes.
Getting the Installer
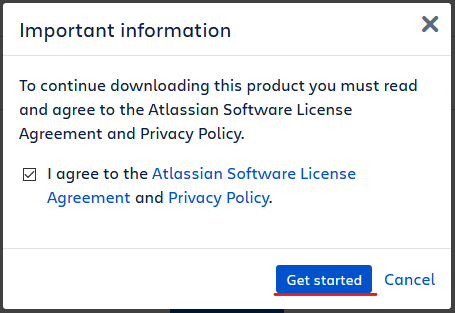
To get the installer, I’ll go to the JIRA Download Page, the click All Versions. From there, I’ll navigate to my target version, then select “Linux 64 bit”. At this time I have the same options of downloading it to my local computer and transfering it, or using wget to download it directly to the server. Be sure if you do the latter, that the URL you copy ends with the file extension “.bin”. The link to the download should be the “Get started” button that lights up after you agree to the Atlassian Software License Agreement, if you wish to copy/past it to the server.
Once you download or transfer it to your server, you will need to modify the permission so you can run the file. You can do so with the following command:
chmod 755 ./atlassian-jira-software-*.binThis command uses a wildcard, so it should work for all future versions of JIRA – or at least until Atlassian changes the naming convention on their releases.
Running the Installer
Now comes the bit we’ve all been waiting for. Running the installer. I’m not going to lie to you, this part is going to be dry. There’s no help for it.
Anyways, to start it, just type in the file into your command line. If you wish to run JIRA as a service, you will need to either run this as root or run this in sudo.
./atlassian-jira-software-8.1.3-x64.bin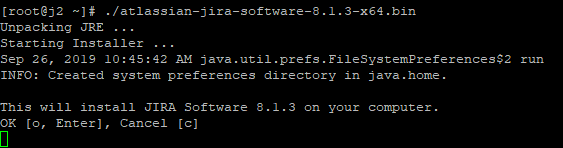
The first question it will ask is if you really want to install JIRA here. Take a moment to confirm the JIRA package and version are correct. I intended to install JIRA Software 8.1.3, so this all checks out. Hit enter or “o” followed by enter to proceed. Press “c” then enter to cancel the installer.

The next options it gives us to to select the operation we want to proceed with. Our options are:
- Express Install – uses all the default options. As we want to change our home directory, this isn’t the option we want.
- Custom Install – This is for more advanced users, it allows you to customize where JIRA is installed, where it’s home directory is, what port it uses, etc. This will be our option today.
- Upgrade an Existing JIRA install – not applicable here, but this is the option people are probably more familiar with.
So, considering how we want to set this up, we’ll hit “2”, then enter

The next question is in regards to our Install Directory. We want to keep this default, so we can just hit “Enter”

After this the installer will ask for the location of our home directory. As we want to change this, I entered the location for it. The installer will create any parent folders it needs to make the final structure you put here, so I find it helps to match their default structure as much as possible. Enter your chosen directory, double check it (no really….it’s going to be a headache otherwise), and hit Enter. If you wish to keep the default, just hit “Enter” without entering anything.

Next JIRA will ask you which ports you want it to use. As JIRA does not run as root, it cannot run natively on ports 80 and 443. Unless you plan on running more than one JIRA instance on the same server, you can keep to the defaults here.

The next question will ask if you want to run JIRA as a service. What this means is two fold: first JIRA will start up as part of the server boot sequence, and second you can start/stop/restart JIRA using systemctl. So…the answer to this is “Of course!”, so you can hit enter.

The last question here before JIRA is installed is asking you to confirm all the settings you entered. Just run over them to make sure they are correct, then hit enter.
It is at this point the installer will extract the files, install everything where it is needed, and setup the service. All told this process takes about a minute. After it is done, you should see this.

We actually do not want to start JIRA yet, as we have one more step to complete before we can give it a first boot. So type “n” then enter. This will complete the installer run.

After the Installer
As stated, we need to install the MySQL JDBC connector into JIRA. Due to licensing constraints, Atlassian is not allowed to distribute this as part of their software, so this is a step we must take.
To download this, we’ll need to look at the MySQL page for this. As always, choose your download method for this and move it onto the server. I will download the compressed TAR Archive as the tools for that are pretty common on linux servers.
wget https://dev.mysql.com/get/Downloads/Connector-J/mysql-connector-java-5.1.48.tar.gzI will then need to decompress the file with the following command:
tar -xzvf ./mysql-connector-java-5.1.48.tar.gzAfter I’ve extracted the files I’ll need to copy the given file into the JIRA Install Directory.
cp ./mysql-connector-java-5.1.48/mysql-connector-java-5.1.48-bin.jar <jira_install_dir>/lib/After this, we can finally start JIRA on the server, and start working in a web browser to finish it’s setup.
systemctl daemon-reload
systemctl start jira
systemctl status jira
The first command tells the system controller to reload what services are available – that is to say tell it to find JIRA’s service description. The second command starts JIRA, and the last is to make sure the service is up and running correctly. I recommend we take a few seconds between 2 and 3 to let things start up.
If “systemctl status jira” comes up clean, you can run the next command to make sure it comes up on boot.
systemctl enable jiraYou can also use the following command to follow JIRA as it boots up. In fact, I will usually do this anytime I need to restart the JIRA service.
tail -f <jira_home_dir>/log/atlassian-jira.logFirewalls
If you immediately try to jump onto the server on JIRA’s port, you may notice it fails to connect. CentOS and RHEL both use firewalld. This is a fact I’ll often forget, and sit there scratching my head for five minutes before feeling like an idiot. This is an easy fix, we just need to add an exception in there to allow traffic to flow on port 8080. This will only be temporary, because as soon as we get JIRA configured at set up, we’ll work on a proxy to handle traffic so it runs on port 80/443.
To add the exception, use the following command as sudo or root:
firewall-cmd --zone=public --add-port=8080/tcpAs the Database is located on the same server as the JIRA server, we do not need to open up port 3306 for MySQL traffic. However, if you’ve set up MySQL to run on a seperate box from JIRA, you will need to open up this port. However, we should be good to go for this build.
Post Install Setup
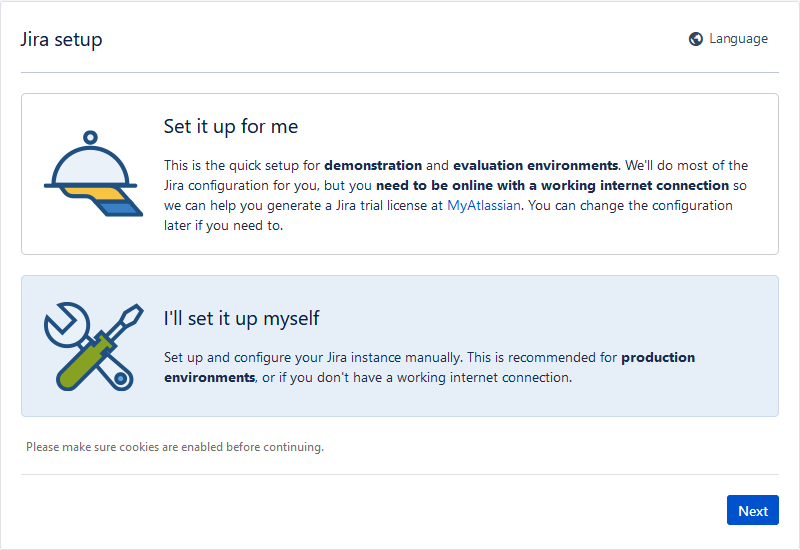
Assuming the system has come up cleanly and you’ve configured our firewall, you should see the above screen when you use your web browser to navigate to
http://<ip_addr_of_server>:8080You will want to select the second option marked “I’ll set it up myself”, then “next”, which will take you to the appropriate wizard.
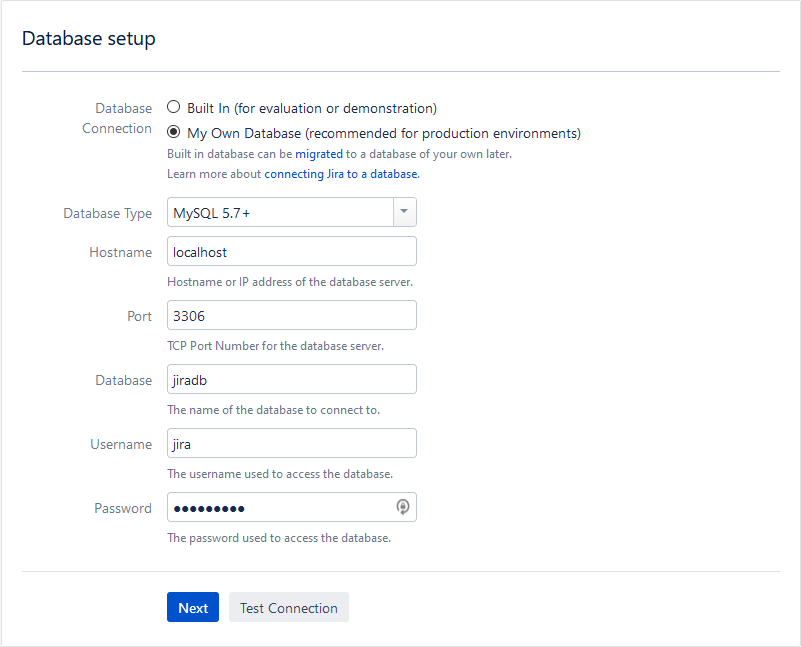
The next screen will ask you for some details on the database. Here you will select “My Own Database”, then enter the details. The database, username, and password will have been set during the “JIRA’fying this DB” section from last week’s post.
Click “Test Connection” to be sure everything is correct before hitting “Next” to proceed. This will setup the Database. Depending on your system speeds, this will take a few minutes, so you might want to go get some water.

The next step will be some customization for your instance. You will need to put a base URL that works for now. Once we have the proxy setup, we’ll need to change it, but it will work until that time. As for the Application title, I always prefer to go with something like “Company – JIRA” or “Company – Division – JIRA” as appropriate. Just something to uniquely identify this JIRA instance within your organization.
If this is a test instance, I also like to add the word “DEV” or “TEST” at the beginning, to further emphasize this is not Production.
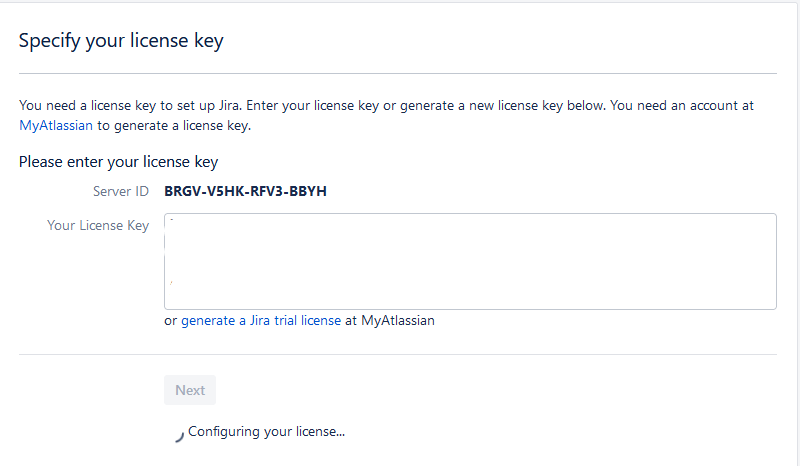
The next screen will ask for your license key from Atlassian. Copy/Paste it from https://my.atlassian.com and click next to proceed.
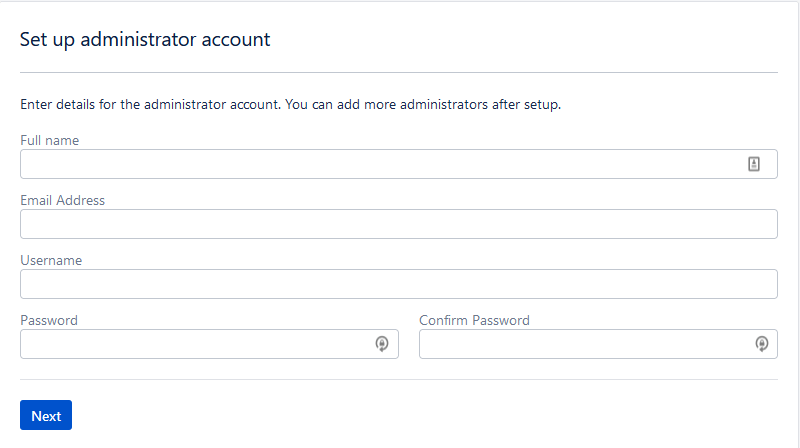
The next step will ask you for a admin username and password. A word of note here: Even if you intend to use Active Directory or Crowd to manage users, you will still need at least one local admin account. The reason why is you cannot edit a directory from an account associated with that directory, even if that account has the correct Admin privileges This means you will need a local account to modify that directory.
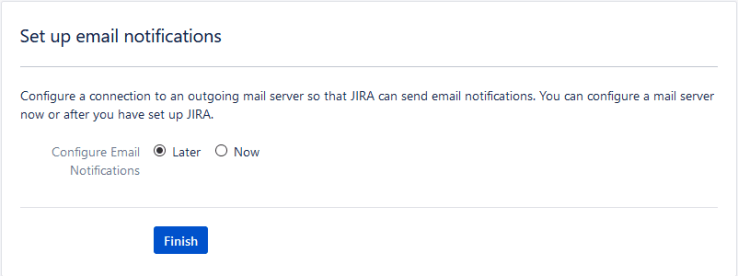
After you setup your account, it will ask you whether you want to set up a mail server. You will want to set this up before you move to production, as this is the main way JIRA communicates issue updates. That being said, you do not have to do it now, so we’ll take a pass on it today.
Click finish, and JIRA will take a second while it finalizes some system settings. However, we are not done yet!
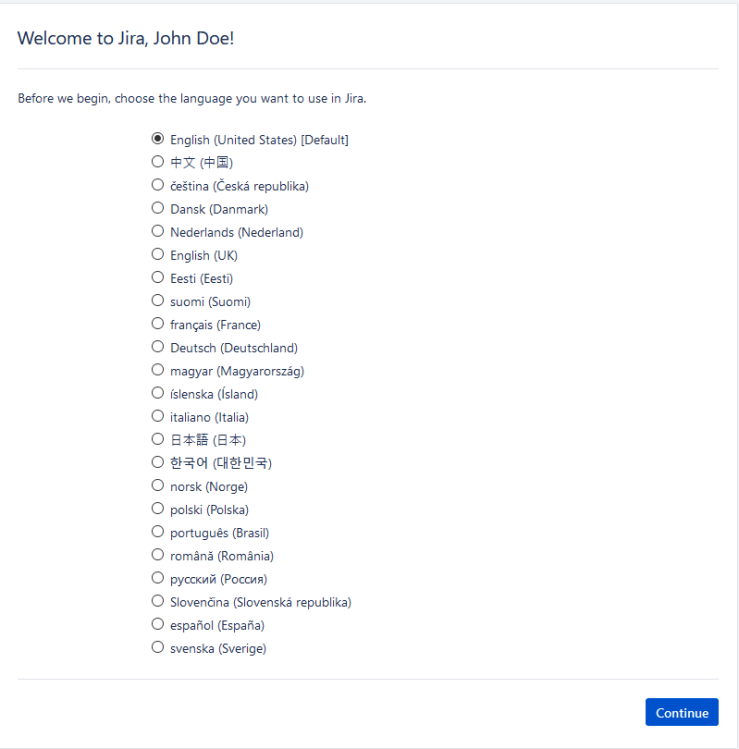
That’s right, we need to finalize our account setup. Here you will choose the language appropriate for you, then click “Continue”
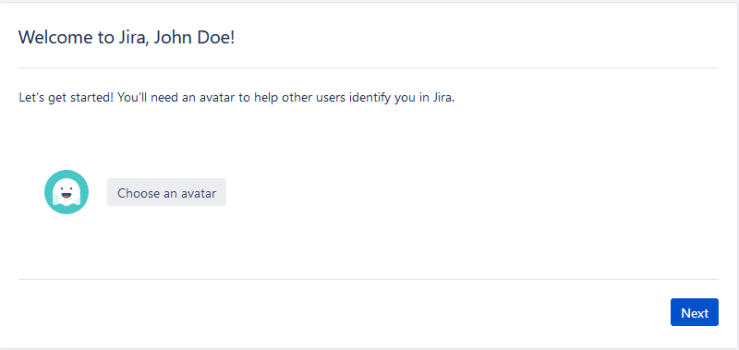
Next it will ask you for an avatar. This really isn’t required, and you can click next right away, but why would you say no to this friendly little ghost?
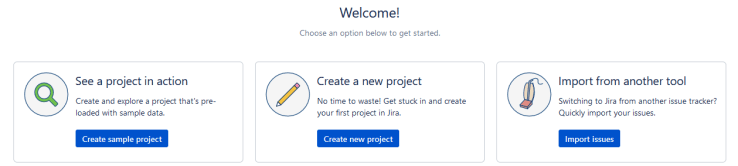
And finally JIRA will ask you if you want to setup a first project. Your options are:
- See a project in action – This will create a JIRA project with some issues, so you can see how one looks when it is actively being used.
- Create a new project – This will create a blank JIRA project from one of the default templates.
- Import from another tool – This will allow you to import from another tool, like Bugzilla, Github, etc
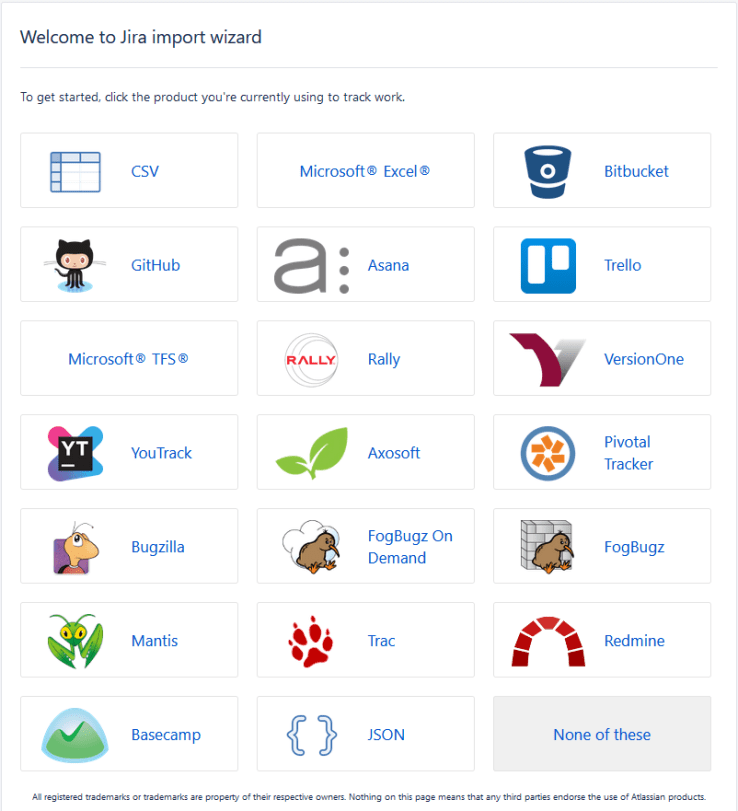
As you can see, you have a good few options here. At the very least, you should be able to get something into a CSV format. I’ve done plenty of these, and can say that it will work fairly well so long as you have good clean data.
And that’s it for now!
We’ve gone from a blank server to a functioning JIRA instance! While this is definitely a milestone to celebrate, we are not quite done yet. Next week we’ll see what settings we’ll need to modify to get web traffic going through SSL.
This will require us to modify system files, setup Apache, and change some settings with JIRA itself. That being said, if you’ve made it this far you shouldn’t have any problems moving forward.
One of the things I intend to release once I finish this series is a checklist you can use as you proceed to make sure you aren’t missing any steps. When I’m going an upgrade or other maintenance, I’ll always take time beforehand to prepare one, and print it out so I can check things off as I’m doing it. I’ll even include the pre-flight checklist to make sure we are good to go.
Next week we are taking a break from this project. The last two week’s post has inspired me, and I will take a look next week to see if you can run JIRA smoothly on one of the new Raspberry Pi 4’s. Just experimenting for experiment’s sake. After that we’ll return to this project with setting up the Proxy through Apache. So until then, I’m Rodney, asking “Have you updated your JIRA issues today?”
Discover more from The Jira Guy
Subscribe to get the latest posts sent to your email.

1 Comment