
Well, today, it seems we are going to do something I admittedly rarely do on the blog. That’s right; today, we are going to admit that JIRA Cloud exists!
It’s not that I have anything against JIRA Cloud. My specialties tend to lie around making sure the underlying JIRA system runs as smoothly as possible, which is hard to do when you don’t own the underlying system. However, there is still plenty of overlap between JIRA Server/DC and JIRA Cloud, so it’s not like I’m unqualified to speak on it!
So it’s no secret at work that I maintain a whole collection of personal test systems. I do this to replicate and test just about anything I want without waiting for permission. The environments include (but are not limited to):
- VCenter Environment for VM’s
- More Raspberry Pis than I rightly know what to do with
- AWS Account
- Azure Account
- Cloud Environments of Confluence, Bitbucket, JIRA Software, and JIRA Service Desk
- Server Environments of Confluence, Bitbucket, JIRA Software, and JIRA Service Desk
- Several VPS online, including one running (wait for it…) Confluence.
So, when my manager wanted some help looking into some oddness he saw in JIRA Cloud using Azure AD, he knew who had the tools to recreate and test that setup.
However, I didn’t know how to set up the integration when I started. So I had to learn that. And since I had to learn, I might as well help you learn too!
Pre-reqs
To pull this off, you will need a few things first.
- An Azure AD subscription. If you don’t have a subscription, and just want to do some testing, you can get a one-month free trial here.
- Atlassian Cloud single sign-on (SSO) enabled subscription.
- To enable Security Assertion Markup Language (SAML) single sign-on for Atlassian Cloud products, you need to set up Atlassian Access. Learn more about Atlassian Access.
- A Claimed Domain with Atlassian. To do this, you will need to be able to modify the DNS records for your domain.
Also, we cannot forget the documentation. This actually was from Microsoft, and not Atlassian! Shocking, I know. But it was on point and guided me through most of the process.
- https://docs.microsoft.com/en-us/azure/active-directory/saas-apps/atlassian-cloud-tutorial
- https://docs.microsoft.com/en-us/azure/active-directory/saas-apps/atlassian-cloud-provisioning-tutorial
Setting up Single Sign-On (SSO)
Single Sign-On, or SSO, is a mechanism that does what it says on the tin. If you log in to any application participating in the SSO environment, you will not be required to re-enter your password to sign into any other participating app. So if both your JIRA and Confluence are a part of the same SSO environment, you can start working in JIRA, then move over to Confluence without having to pause to authenticate again.

- To get started, go to your Azure AD Directory, then click “Enterprise Applications” in the sidebar (underscored in red). This page is where you will set up the Integration with Atlassian Cloud.

- Now that you are on the Enterprise Applications Screen click “New Application.”

- In the search bar shown, type “Atlassian Cloud”. Doing this will bring the integration up in the search results. Once it appears, click on it.

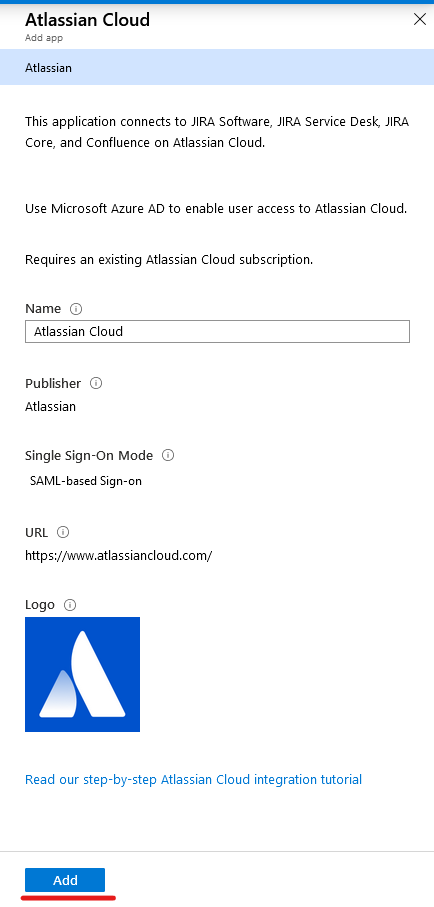
- Clicking the search result will cause the following menu to Pop up on the right-hand side. You won’t need to modify anything here, so you can click “Add” at the bottom of this menu.
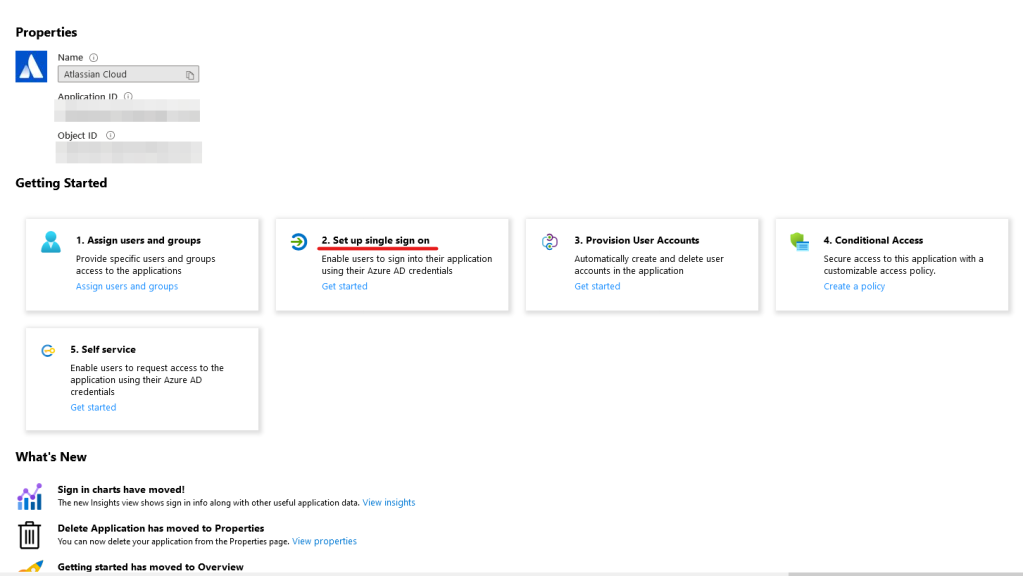
- We can safely skip “1. Assign users and groups” for now. Proceed by clicking “2. Setup Single sign-on.”
- On the next screen that appears, you are presented with three choices. Select the second option that says, “SAML.”

- Next, you will get a pop-up asking about Saving. For now, click ‘No, I’ll save later.”

- You can save Section 1 on the next screen for later – as you will need information from Atlassian to complete this section. Instead, move onto Section 2 by clicking it’s “Pencil” icon.
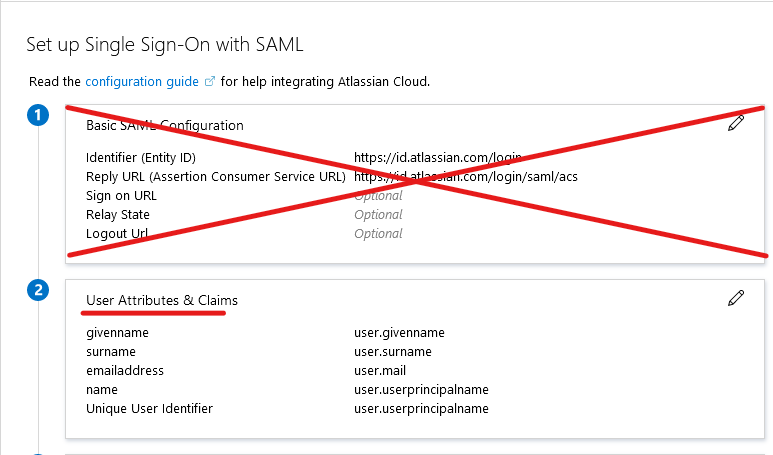
- Here, we’ll only need to update one attribute. By default, Azure AD wants to send the user’s Principle Name to Atlassian Cloud. However, Atlassian wants the email address in this field. So to change it, click “Unique User Identifier (Name ID).

- Doing so will cause the following form to appear. Change “user.userprincipalname” to “user.mail” under Source attribute, then click “Save.”

- On the Navbar, click “SAML-based Sign-on” to return to the previous section.

- With the Attributes & Claims ready, we can start collecting information Atlassian will need. To begin with, download the Base64 Certificate in Section 3 to your local system.

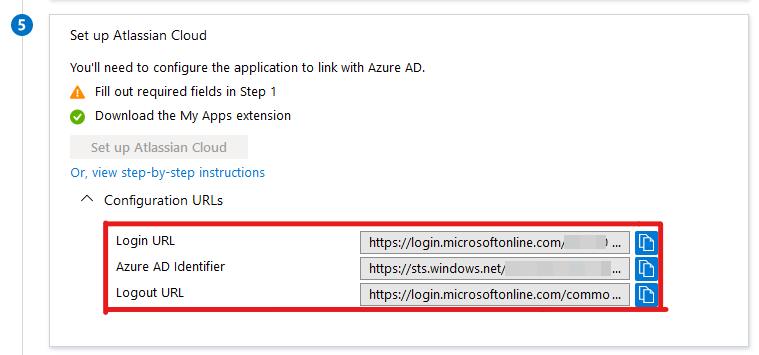
- The next three pieces of data we will need are in Section 5. Copy the three URL’s highlighted below to a notepad you can reference later. To find them, you will need to expand the “Configuration URLs” Dropdown menu.
- Now we can switch over to Atlassian and start the setup there. Under your https://admin.atlassian.com admin page, Select Security →SAML single sign-on


- On the page shown below, click “Add” SAML configuration.”

- Now we can start entering the information we got from Azure AD. Be sure to pay attention to how I have it mapped below, as Atlassian and Azure have different names for each field.
- Enter Login URL from Azure into the Identity provider SSO URL field
- Enter the Azure AD Identifier from Azure into the Identity provider Entity ID field
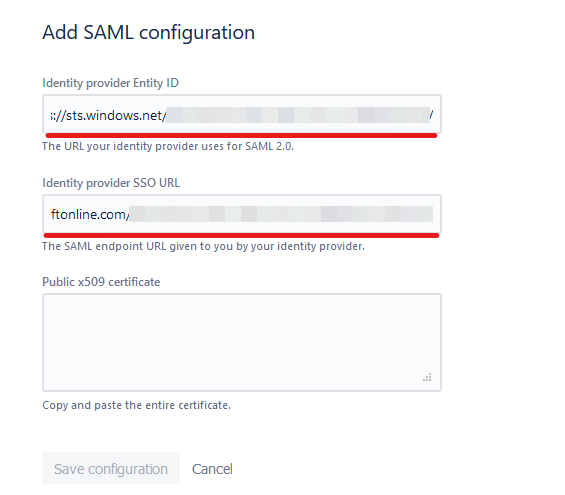
- Now open the Certificate you downloaded in Step 12 in a text editor of your choice. Copy the contents into the Public x509 certificate Field, then click “Save.”

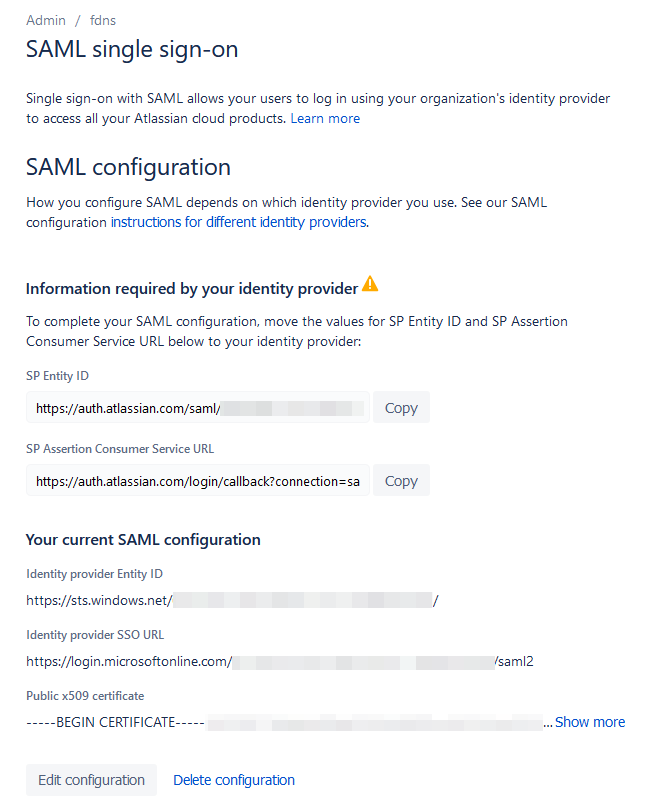
- Now we will need to give Azure some information on your Atlassian Cloud setup. To do so, copy the “SP Entity ID” and “SP Assertion Consumer Service URL” fields from the next page.
- You remember in Step 8, when I had you skip Section 1 on Azure’s SSO Configuration? Now is when we will go back and fill it in by clicking the “Pencil” icon.

- Here we’ll copy in the two URLs we copied in Step 18 into the two highlighted fields. Be sure to pay attention below, as again, Azure and Atlassian disagree on what to call these fields.
- The SP Entity ID field from Atlassian goes into the Identifier (Entity ID) field in Azure
- The SP Assertion Consumer Service URL field from Atlassian goes into the Reply URL (Assertion Consumer Service URL) field in Azure
- Be sure to click the “Default” checkbox next to both, then click “Save”

- You should get a Pop-up asking if you want to Test single sign-on. Click “Yes”. This will open the following screen. If your user is already provisioned in Atlassian Cloud, click “Sign in as current user”
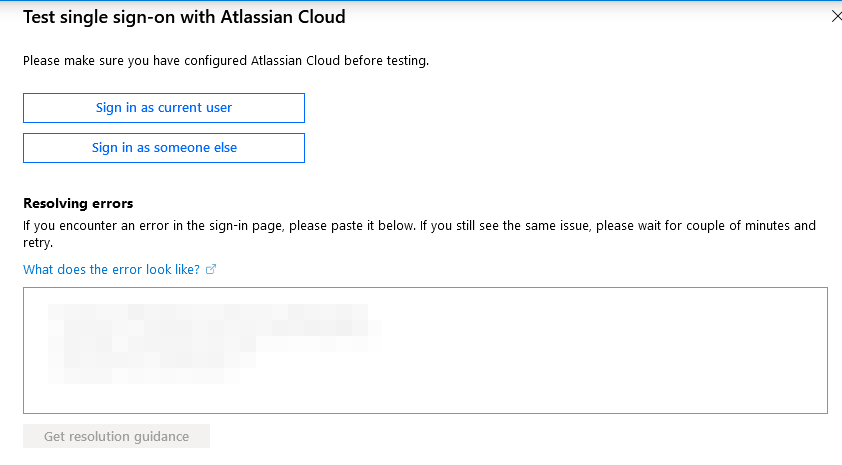
- Congratulations, SAML SSO is now setup!
Setting up User Provisioning
So, we have SSO setup. Great!
As things stand now, you still have to go and manually populate every new user in your Atlassian environment. Not Great.
To resolve this, we’ll next setup User Provisioning, which also does what it says. This process will automatically set up new users in your Atlassian Cloud system as you add them in AD. Which, once again, will be Great.
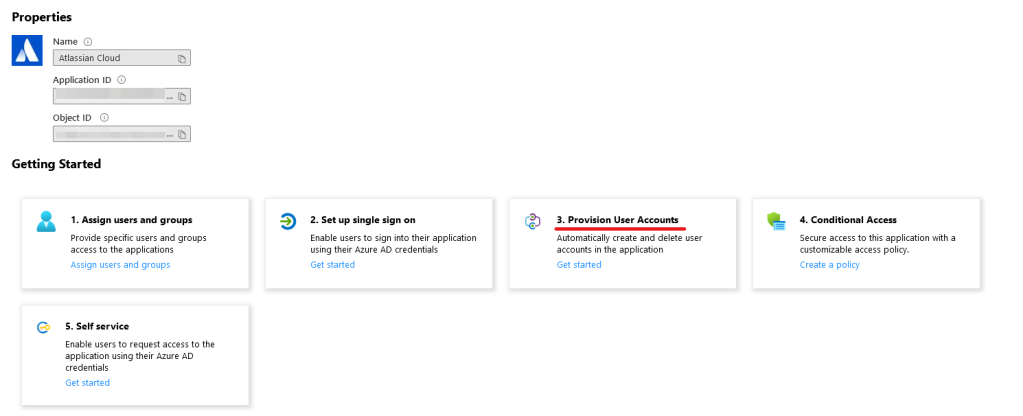
- Go back to the Atlassian Cloud Integration page in Azure. This is the page from Step 5 of the SSO setup above. Once there, click “Part 3. Provision User Accounts.”
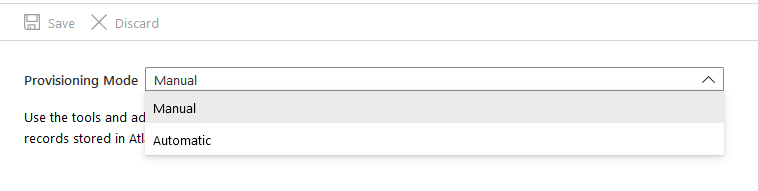
- On the next screen, we will select “Automatic” under Provisioning Mode:
- Next, we’ll need to set up some things under your Atlassian Access screen (https://admin.atlassian.com). To get started here, click “Back to organization” → Directory → User Provisioning.


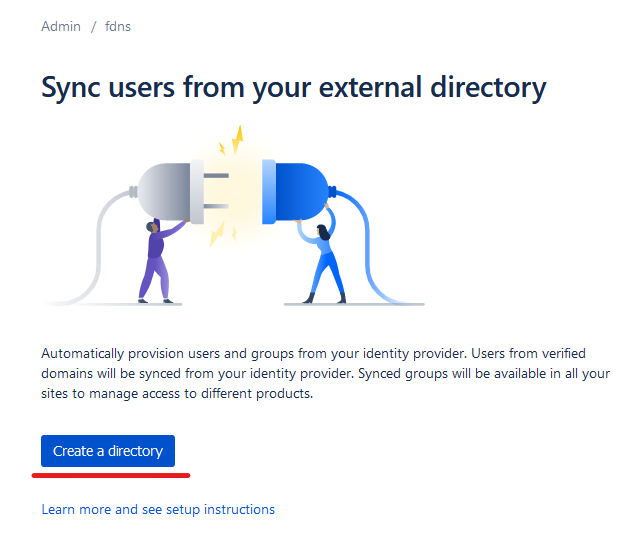
- Now we will click the “Create a Directory” page to get started here.
- Enter a Name for your Directory. To keep it descriptive, I like to copy the name from the Azure Directory. After we enter the name, click “Create”:

- With this created, Atlassian presents us with two pieces of information that we’ll need to give Azure. Copy both the URL and the API key.

- Back within Azure, we will enter both of these into the Admin Credentials section. Again, be careful here as Atlassian and Azure disagree on what to call them.
- The Directory base URL from Atlassian will go into the Tenant URL field in Azure
- The API key from Atlassian will go into the Secret Token field in Azure
- Be sure to test the connection after you enter both
- OPTIONAL: You can also enter a Notification Email to get failure notices.

- On the next page, Mappings, you can use the defaults as-is. Just click “Next.”
- Under Settings, Set “Provisioning Status” to “On,” then Set Scope to “Sync Only Assigned users and Groups.”
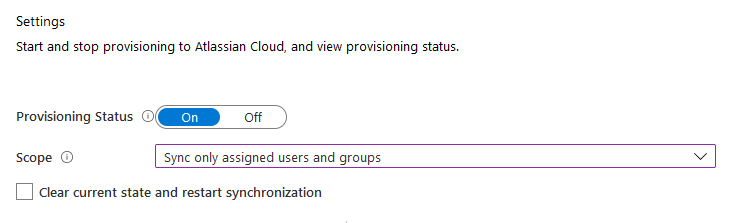
- Click “Save,” and you are done!
Azure AD will not sync your selected users to Atlassian automatically! But which users will Azure sync? That is the focus of our next section!
Adding Users and Groups to sync to Atlassian Cloud
So with our setup right now, we have Azure syncing over only selected users to Atlassian. We set it up like this because if you sync everyone and have a large AD environment, you can quickly find yourself out of licenses on JIRA. So let us explore how we tell Azure which users it needs to set up in Atlassian Cloud.
- Back on the Atlassian Cloud Overview Page (again, from Step 5 of the SSO Setup), click “Users and Groups” from the sidebar.

- On this screen, click “+ Add User” at the top of the screen.

- Click “Users” then select the Users that Azure should sync with Atlassian Cloud. Repeat for Groups that you would like to also sync over to Atlassian Cloud.
Note: As I did my testing on Azure’s free tier, I didn’t have groups available to get a screenshot of. Sorry!

- Select Role then click Assign. Congratulations! These users will now be populated into Atlassian Cloud during the next sync operation!

And that’s it!
You now have your Atlassian Cloud environment setup and ready to use Azure for Authentication! If you are already leveraging Azure AD to manage your users, it is just one less headache to worry over.
Job Seeker Profile!
So, it does happen where someone searching for a job will contact me to ask if I know of any open positions. Unfortunately, I am not always able to help them in that regard. However, given the uncertain times we live in, I want to do something. So I’ll feature them here.
That is the case today with Siva Kumar Veerla from Hyderabad, India. He has recently been thrown into the job market due to the COVID-19 Pandemic. From his CV, he is a solid Atlassian Administrator who has led several projects, including upgrades and system installs. He is currently looking for opportunities in India or Europe. If you think he might be a good fit for you, please feel free to contact him on LinkedIn or through the information on his CV.
And Other exciting things!
Let me just say…Wow. This month has been amazing! For starters, look at this.
Yes, that is a new record month for the blog! Thank you for continuing to read, comment, like, and share the blog on the various Social Media platforms.
I’d also like to thank Predrag Stojanovic especially, who pointed out an Atlassian Group on Facebook. And well, that group loved last week’s blog post! So, I’ve gone ahead and set up a Facebook page for thejiraguy.com blog! Like Twitter, like this page to get the latest posts from the blog and random Atlassian news I find interesting! You can also subscribe below to get new posts delivered directly to your inbox!
Also, I will be giving a presentation tomorrow on Monitoring your Atlassian Applications using Nagios! If you are in the Atlanta, GA area, tune in Thursday! If you are not, I am trying to refine this presentation to submit to Atlassian for Summit. So, with a bit of luck, you’ll be hearing it from me next April!
But until next time, this is Rodney, asking “Have you updated your JIRA Issues today?”
