
Beware of fiends and dragons on the gargoyled eaves. You are embarking on stage 2 of the Atlassian Dragon Quest.
In this stage, you will try out two JIRA Apps that extend the functionality of JIRA: JIRA Agile and Capture for JIRA. JIRA Agile is bundled with JIRA and lets you use JIRA for Agile development. You will need to install Capture for JIRA into JIRA. Capture for JIRA is used for Agile testing.
Time estimate: This stage will take approximately 60 minutes.
On this page:
- Step 1. Create a sprint with issues using JIRA Agile
- Step 2. Install Capture for JIRA
- Step 3. Create a Capture for JIRA Test Session
- Step 4. Report a Bug via Capture for JIRA
- Victory!
Step 1. Create a sprint with issues using JIRA Software
JIRA Software is what was called JIRA Agile in JIRA v6. It comes with the ability to update your issues using Agile Boards or the standard JIRA Interface. For this exercise, you will do your updates using Agile Boards.
- Select Projects > Create project
- Select Scrum software development from the Project Type List
- Click Next
- Click Select
- Enter the following information and click Next:
- Project name:
Dragons 10 - Project key:
DRX
- Project name:
- Next you will create some issues. Click Create at the top of the screen to create a new issue and enter the following values
- Issue Type:
Bug - Summary:
Exploding flame extinguishers - Priority:
Highest
- Issue Type:
- Tick the checkbox at the bottom of the dialog to create another issue and then click Create to create the issue.
- Add a second issue with the following values:
- Issue Type:
Bug - Summary:
Fire-breathing dragon has escaped from enclosure - Priority:
High
- Issue Type:
- Uncheck the
Create anothercheckbox and then click Create to create the second issue. You will see your cards in the backlog. See screenshot 2 below. - Click the Create Sprint button and then drag your cards from the backlog into Sprint 1 and then click Start Sprint.
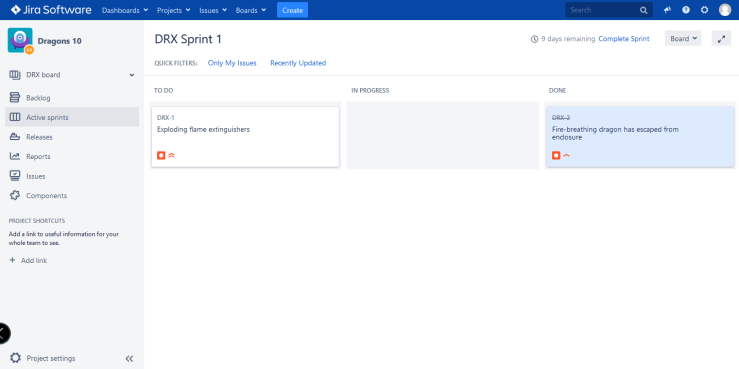
- Click the Start button on the Start Sprint dialog as shown in screenshot 3.Now click and drag issue
DRX-2from the To Do column to the Done column. See screenshot 4.


Step 2. Install Capture for JIRA
In this step you will install the Capture for JIRA plugin into JIRA, and add the associated extension for your browser.
- Go to your JIRA URL in your browser. For example,
http://localhost:8080/ - Click System Administration Gear > Manage Apps in the top menu. The Atlassian Marketplace screen will appear.
- Enter ‘Capture for JIRA’ into the Search the Marketplace text box and press Enter.
- Find the Capture for JIRA add-on name in the list of Apps and click Free Trial.
- A window will open to show the progress of the installation. When Capture for JIRA has been installed, you will be prompted to enter your Atlassian account details to obtain and apply an evaluation license from Atlassian. If you logged in with your Atlassian account to install JIRA Agile recently, you should not need to do this.
- Click Get Started. You will see the ‘Getting Started’ screen.
- Click Get the Capture for JIRA Extension.
- A screen will appear with a link to download the Capture for JIRA extension for your browser. Click Download Capture for JIRA and follow the instructions to download and install Capture for JIRA for your browser. After Capture for JIRA is installed, the Capture for JIRA icon will appear in the top right corner of your browser. (If you are using Internet Explorer, you can also open Capture for JIRA by selecting View > Explorer Bars > Capture for JIRA .)
- If you are forced to close your browser when the extension is installed, log back in to your JIRA instance.
- Now Click in the Capture for JIRA icon to configure the connection to your JIRA Instance. Put your server url, username and password to finish the configuration of Capture for JIRA.Note: this step is not required if you are using Firefox.

Step 3. Create a Capture for JIRA Test Session
You can use Capture for JIRA to create issues directly in JIRA while manually testing a web application. First you will add a test session, where you can plan and track your testing.
- Click Projects > Dragons 10 (DRX) at the top left of your JIRA screen.
- The ‘Summary’ page for the ‘Dragons 10’ project will appear. Click the Test Sessions tab in the left-hand panel.
- The ‘Test Sessions’ page will appear. Click Create Session and enter the following information:
- Name:
Find the exploding fire extinguishers - Assignee:
charlie - Related Issue:
DRX-1 - Additional Information:
Exploding fire extinguishers are dangerous. Let's find them all!
- Name:
- Click Create to add the test session.
- Click the name of your new test session: Find the exploding fire extinguishers.
- The session details will appear. Click Start Session.
- Now you need to go to the page in the application that you are testing. For this exercise, you will use Bitbucket as your test case.
- Open a new window or tab in your browser and go to the Bitbucket website. Click Features at the top of the Bitbucket website. Note: The Features link is only available if you are not logged in to Bitbucket.

