
Now that we have some information about what Jira is and its different parts let’s make Jira useful. Today we are going to cover Searching for issues and what JQL is. I don’t think it’s a stretch to say this is one of the most critical skills you need to get the most out of Jira.
Why is that? Well, searches can be saved as a filter which then can, in turn, power dashboards. And using dashboards means you are no longer just storing and organizing your tasks, but now you are reporting and analyzing how your team works. Of course, JQL is also used in other surprising cases, but dashboards are still one of the primary use cases.
Getting started
As the adage often says, we must first crawl before we walk. So we begin with the basic search. Even if you know advanced JQL, it’s still best to start with a basic search first and then build up your query.
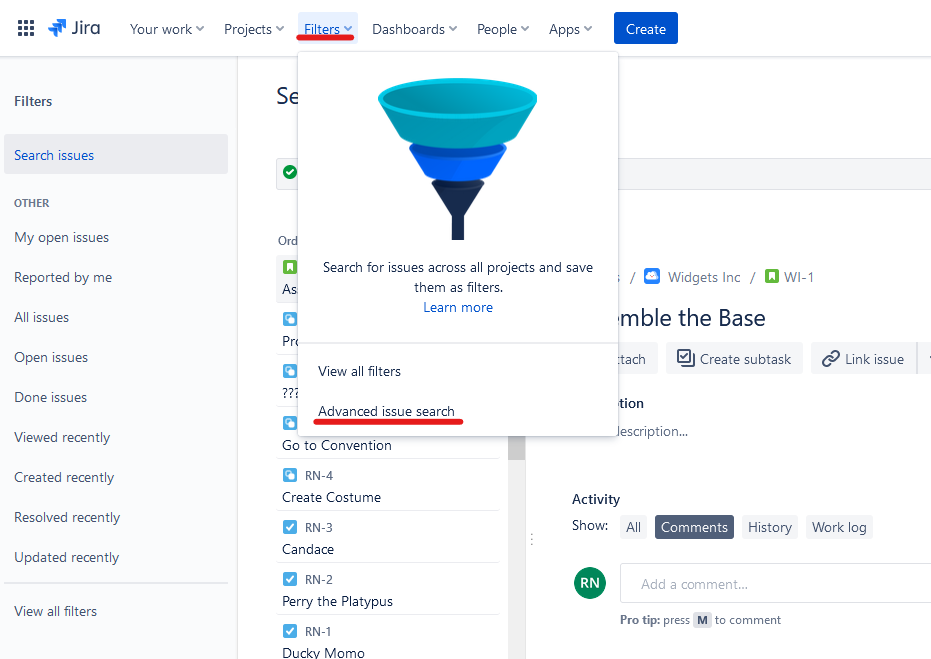
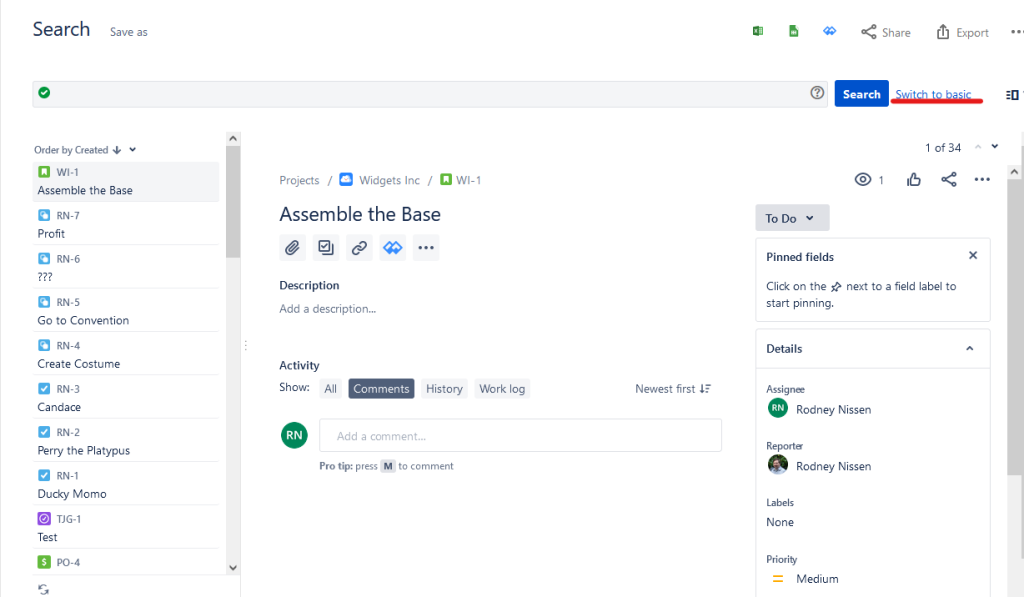
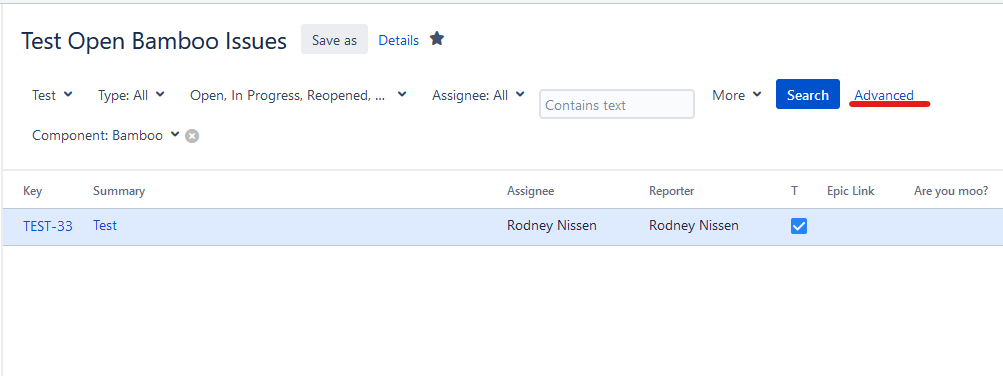
Now how you get to a basic search will vary if you are on Jira Cloud or Jira Server/Data Center. On Jira Cloud, you first click on “Filters”, then down to “Advanced issue search.” If you see just a text bar (such as below), you will then click “Switch to Basic” to get it back to the basic search.

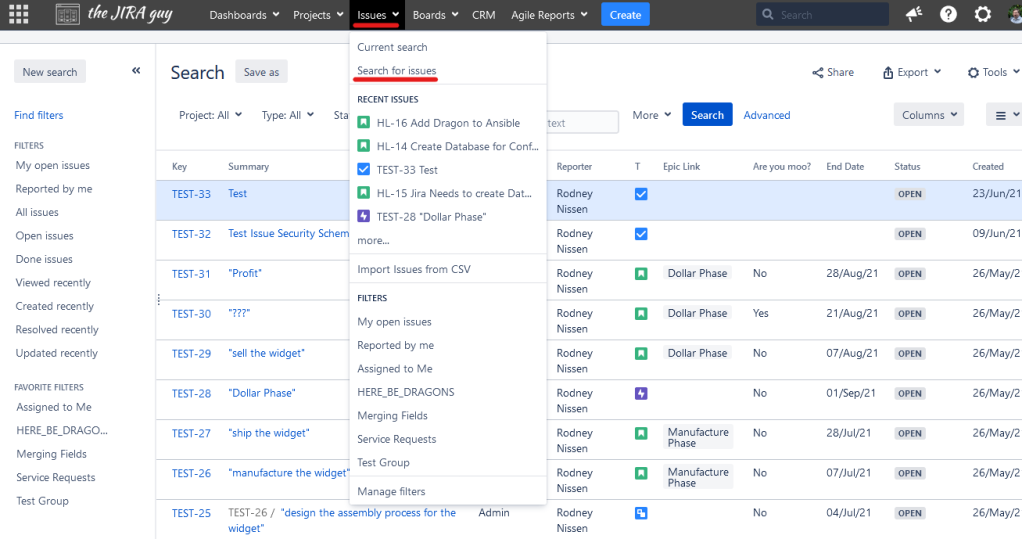
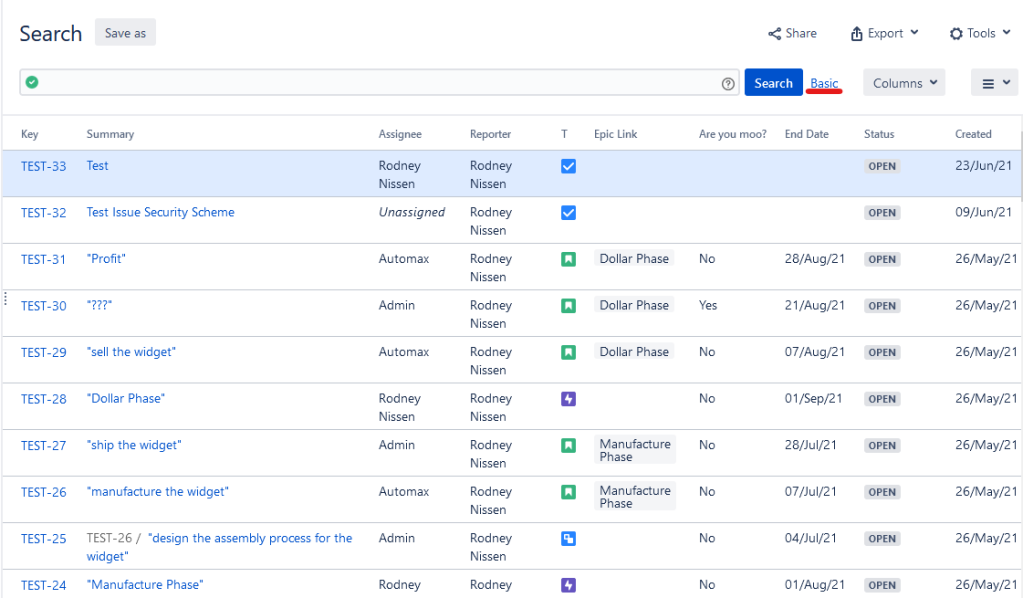
If you are on Jira Server or Data Center, you will instead click on “Issues”, and then click on “Search for issues”, which should take you to a very similar screen. Again, click on “Basic” if all it gives you is a search bar.
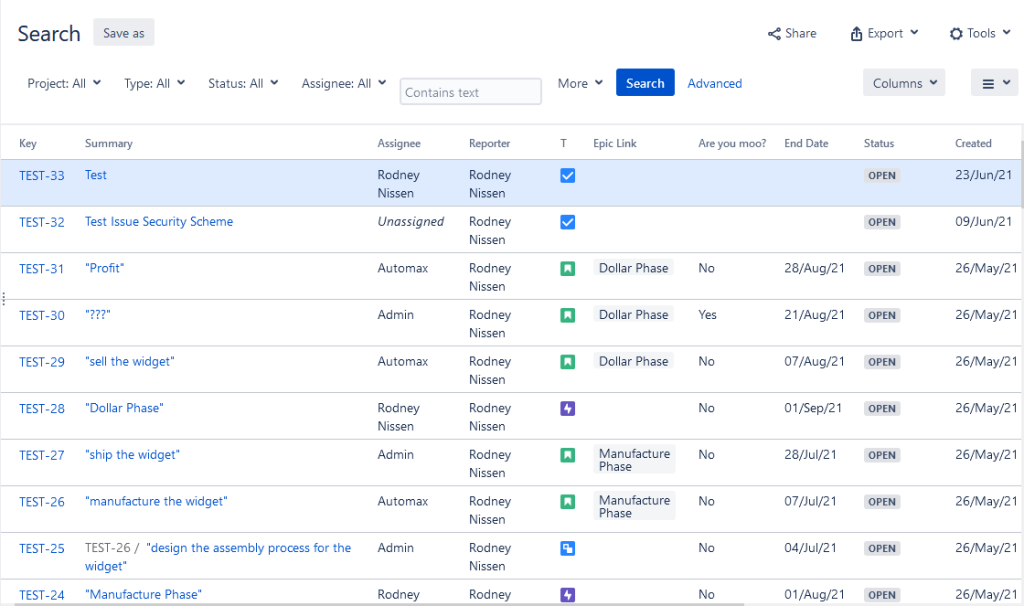
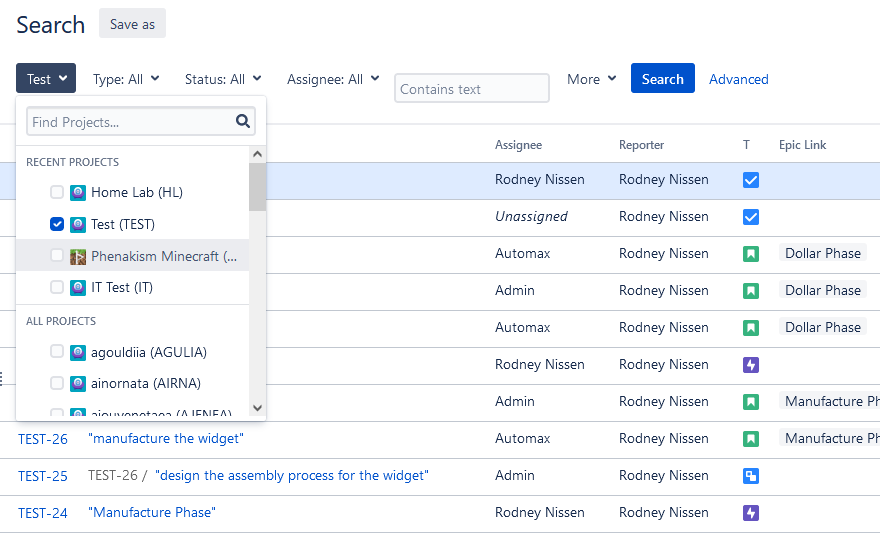
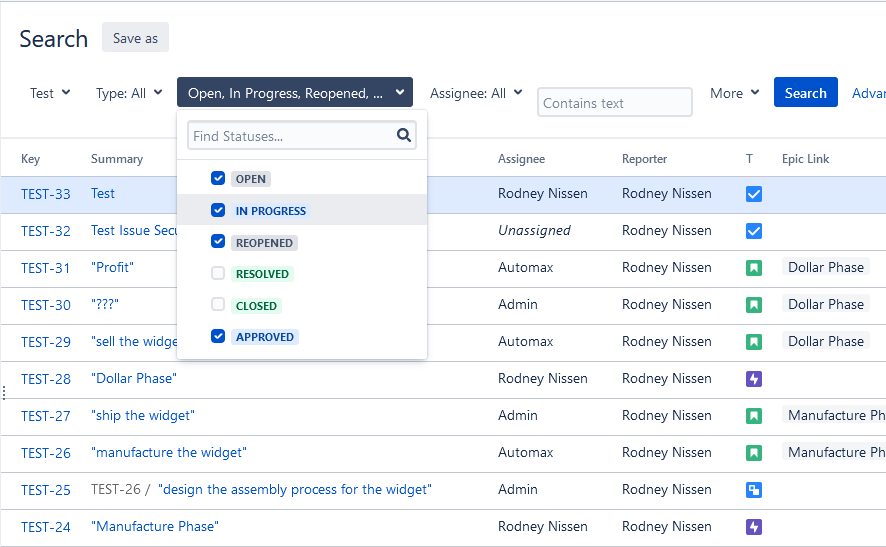
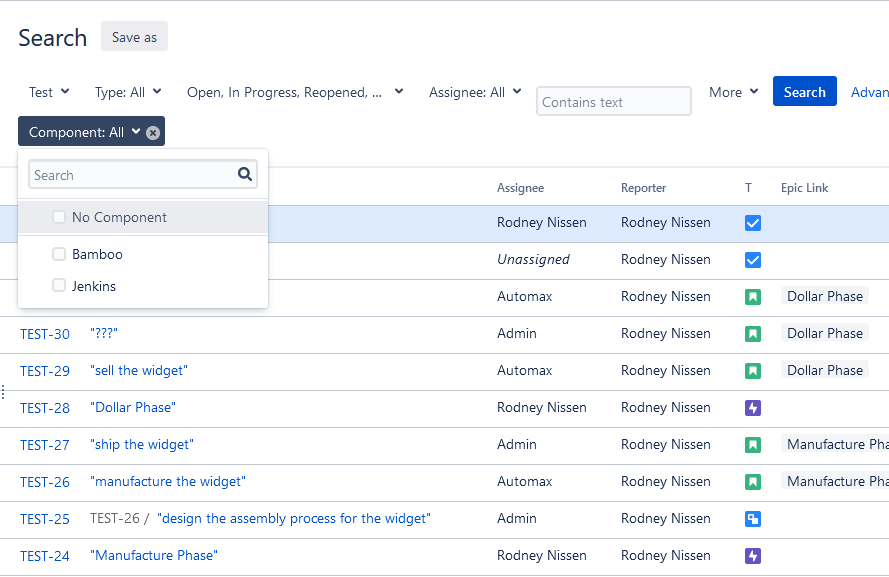
Now that you are on the Search page, you can start entering your different criteria. One I love to do first is “Project,” as that pretty quickly takes away many issues you don’t care about. Then on to status. Do you care about issues that have already been completed or only the issues that still need work done? Are you trying to get to a particular assignee? You can define all that here pretty quickly.
Once you are happy with these, you can click “Search” to have Jira look up all issues that match your defined criteria.

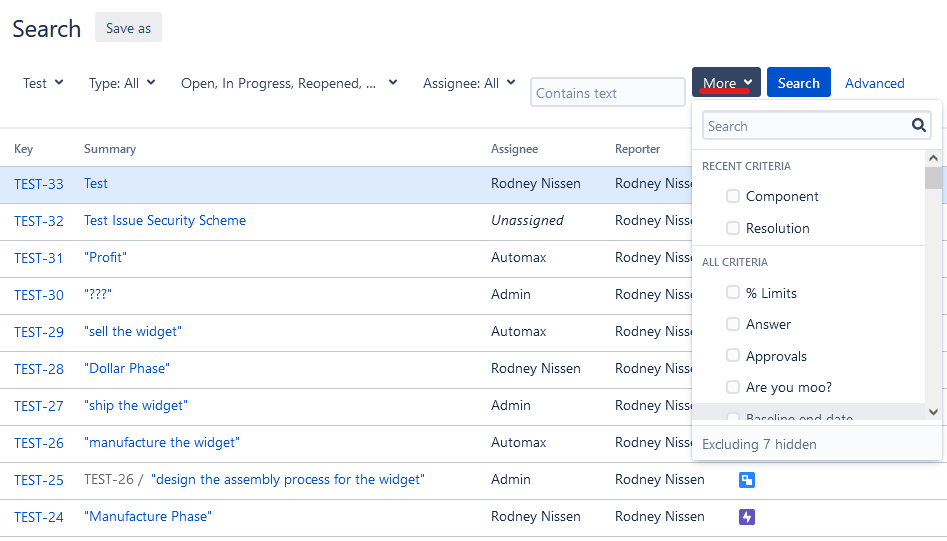
This result is close, but you may want to refine things further based on fields that aren’t listed…yet. Click the “More” button, then search for the field you are interested in. Now select the values you want to use on your new field, then click search again.

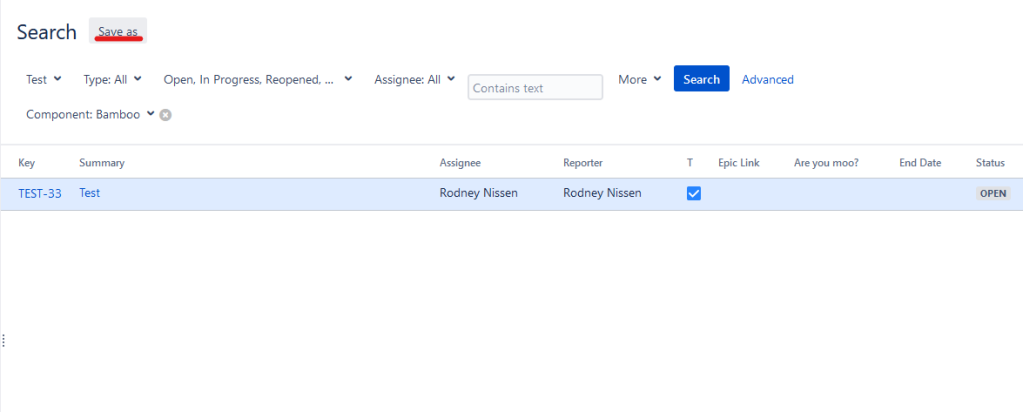
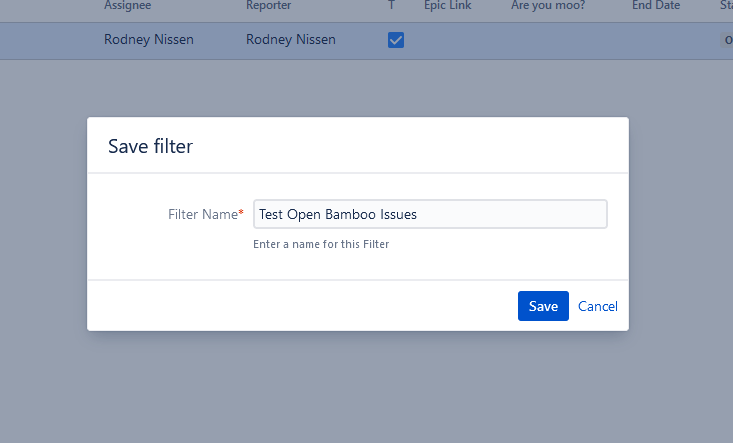
Now that we have our search criteria, we can save this query to return to later or use in a Dashboard Gadget. Click “Save As” near the top of the screen to save this search as a Filter. Doing this will open up a pop-up where you can enter a name for your Filter. Be sure the name is descriptive of the search, as you will need to look this up later, which means remembering what this Filter did.

Sharing your Filter
Now that you have saved this Filter, it is called a private Filter. And let me be clear, Jira means Private. As of this writing, Jira Admins can only see filters that have been shared with other users. I don’t know how useful that will be, but just a fun fact. However, if you want to use it on a dashboard you intend to share, you will also need to share these Filters with others.
To share your Filter, click “Details” next to the “Save As” button you just clicked, then click “Edit permissions.”

This is where things Diverge a bit. You see, in Jira Data Center, you can give other people permission to both Edit and View the Filter. In Jira Cloud, you can only add View Permissions, meaning only the Filter Owner (in this case, You) can modify the Filter.
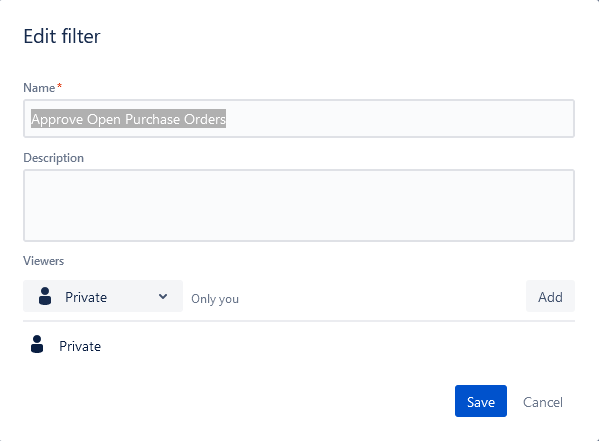

Now, select the method you want to use to tell Jira who can view this issue. In Jira DC, you can select from a Group (defined by your Identity provider or your Jira Admin), Project, or Any Logged in User. You might also have an “Everyone” option, but be careful. Everyone means just that – even people who are not logged in. This share can be especially bad if your instance is available outside your VPN. My favorite method to use is Project, as you can then select your Project, and then you can further narrow it down to a specific role within that Project. If you have made your selection, be sure to click “+ Add,” or Jira will not retain this selection. Thankfully, Jira DC now gives you a pop-up if you forget to click Add – you can imagine how frustrating this was before that Pop-up!

The only Difference on Jira Cloud (other than not being able to define an Editor), is that “Any Logged-In User” is replaced by “My Organization.” Jira Cloud will also not give you a Pop-Up if you forget to add your selection, so be mindful to click that “Add” button!

Jira’s JQL – The Good Stuff
So, now you have your Filter set up and saved, you want to do something a bit more advanced. For example, let’s say you want to select an issue if one of two fields are set. Or do you want to select Items that was in this status yesterday but is in this status today? This type of search isn’t possible in the Basic editor, so we need something a bit scaled up. This situation is where JQL comes on. JQL, or Jira Query Langauge, is a way you can essentially “Program” your query to get more advanced tricks.
To enter JQL mode, you need to click either “Advanced” (On Jira DC/Server) or “Switch to JQL” (on Jira Cloud). Doing so will take whatever query you set up in the Basic mode and show you the JQL running behind it all.

JQL may look advanced, but it’s pretty simple. Most of the options are made by typing the Field you want to search. Jira will give you a contextual search under you as you type. If you find the Field you want, just click the Field you want to complete it.
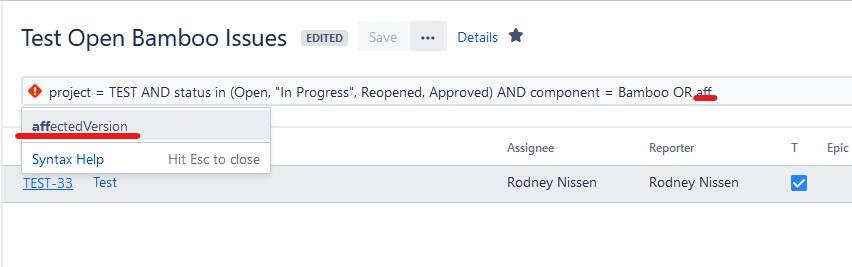
Next, you will type your operation. As with the Field, Jira will give you a contextual menu to know what operations are available for the Field you have. The ones I use most often are equals (=), and in/not in ( not in (list of options) or in (list of options) ).

After you type your operations, Jira will Pop up a list of options for you to put in. For fields like Component and Versions, be aware that Jira will include options from all projects you have access to – even if you set a project earlier in the query. So you can’t depend on it 100% to just have your details available, but usually, typing the first letters is enough to narrow it down to your selection.

Between Different criteria, we can have logical operators. These are “AND” and “OR”. Logical operators compare two or more criteria to determine if an issue matches. For example, if you have all ANDs in your JQL, that means an issue has to satisfy all conditions to be included. An “OR” on the other hand, says that you only have to match one OR the other criteria on either side for inclusion.
I usually like to separate ANDs and ORs with parenthesis to define better how things evaluate. Just like in Math, Jira figures out what criteria inside the parenthesis is, then moves outside and treats the parenthesis as a unit. For example, I’m putting the Component and Affected Version within a parenthesis. This means an issue has to satisfy the Project and status, but can either have a component of Bamboo OR an affects version of 2.0.
project = TEST AND status in (Open, "In Progress", Reopened, Approved) AND (component = Bamboo OR affectedVersion = 2.0)
Lastly, I will talk about the “Order By” operator. This option goes at the end of your query and defines in what order does Jira sorts the return. To use this, type “Order By,” then the Field you want to sort on. Optionally, you can also define ASC for Ascending Order (going from the smaller number to bigger, or from A to Z in the Latin alphabet), or DESC for Descending Order (Larger to the smaller number, or Z to A).

However, JQL isn’t the end-all-be-all. For example, it won’t tell you directly a count. It only returns issues. If you want more analysis like a count or issues, you should return next week when we use the queries and Filters to create a Dashboard.
Further Reading
I’ve actually written about JQL Twice before – but those were from the perspective of someone who is already using it. However, it would make for great additional reading as it expands on what’s here with more tips and Tricks!
That’s it for this week!
Well, I’m exhausted. I just finished a MASSIVE Data Center Migration this past weekend for a Major client. It seems that is the state of Jira these days. 🙂
But what do you think of this series? It’s been interesting writing to people who may not know Jira as well, so I’m enjoying writing it. Hopefully, even if it’s stuff you already know, I’m at least giving you posts you can pass on to your end-users. But let me know what you think! You can find me on my social media platforms via my Linktr.ee link. You can also subscribe below to get new posts delivered to your inbox. But until next time, my name is Rodney, asking, “Have you updated your Jira issues today?”
