
Good Morning Jira Guys and Gals. I’m actually very excited about today’s post. First off, immediately after Team ’21, my wife and I took a weekend off in the Mountains of North Carolina to disconnect from tech and just enjoy being together in nature.

Second of all, Atlassian announced full support for running Data Center in Kubernetes. I had previously experimented with this kind of approach, but I could never quiet get it to work how I wanted it to. So I figured I’d take a deep dive into the topic today, and using Atlassian’s official docker images and Helm charts, see if I can get this working.
Kubernetes? Docker? What Even!?
So to understand what’s going on here, let’s start with Docker. Docker containers lie somewhere between application and VM. They are self-contained, having all the files, OS stuff, etc., needed to run a configuration in a little package, without fussing about configuring the host OS for each application that needs to run. The upshot to this is that if you need to run different applications with conflicting requirements on the same system, it doesn’t matter. They can both live in their containers and never have to bother each other. And because docker images are often created and maintained by the application developers, you also rarely have to worry about prereqs. If your system can run docker containers, then you should be good to go.
However, the flip side is containers are…involved. If you are running one or two containers, you can get away with the command line tools or Portainer. But if you want to work with a complex interconnected application and its dependencies – like, say, Jira Data Center – managing it all by hand quickly scales to the unreasonable. That is where Kubernetes comes in (sometimes abbreviated to k8s). It is a Docker host manager, allowing you to deploy and spread your workload among several hosts, thus abstracting said hosts into a personal container cloud of sorts.
So today I’ll start by setting up three node Kubernetes systems – one master that will act as my controller, and two workers that will host my workload. The ultimate goal will be to make a fully working two node Jira Data Center instance running entirely on the K8S nodes. I have three fresh Ubuntu 20.04 nodes ready to start, so let’s dig into this. I used this guide for the installation of Kubernetes, but I’ll explain all the steps here.
Ubuntu Systems
I have all three of my nodes set up exactly the same.
- CPU: 4 vCPU
- Memory: 6 GB
- HD: 50 GB
You may have noticed that I am using Ubuntu rather than my usual CentOS today. Well, Redhat recently announced some changes that make it hard for me to continue recommending CentOS for production use, so I’ve been experimenting with some other options. And I finally landed on Ubuntu 20.04 as my new recommendation. It’s an adjustment, to be sure, but it still runs stable enough that I am not fussed about using it long-term.
That being said, the first thing I do is make sure they are running on the latest packages:
sudo apt update
sudo apt -y upgrade && sudo systemctl reboot
Installing Kubelet, kubeadm, and kubectl
So, now to install the basic requirements to get started. First thing I do is install Curl and apt-transport-https to each of the nodes
sudo apt update
sudo apt -y install curl apt-transport-https
I’ll then use curl to install the appropriate APT repos for the install.
curl -s https://packages.cloud.google.com/apt/doc/apt-key.gpg | sudo apt-key add -
echo "deb https://apt.kubernetes.io/ kubernetes-xenial main" | sudo tee /etc/apt/sources.list.d/kubernetes.list
Next we’ll install the actual packages we need, then tell APT not to upgrade kubelet, kubeadm, and kubectl
sudo apt update
sudo apt -y install vim git wget kubelet kubeadm kubectl
sudo apt-mark hold kubelet kubeadm kubectl
To check and make sure everything installed as expected, we’ll run the following command:
kubectl version --client && kubeadm version
Now we need to disable Swap. The swap partition can mess with how K8s works, so it’s gotta go.
sudo sed -i '/ swap / s/^\(.*\)$/#\1/g' /etc/fstab
sudo swapoff -a
Next, we’ll need to configure sysctl to handle some network parameters.
sudo modprobe overlay
sudo modprobe br_netfilter
sudo tee /etc/sysctl.d/kubernetes.conf<<EOF
net.bridge.bridge-nf-call-ip6tables = 1
net.bridge.bridge-nf-call-iptables = 1
net.ipv4.ip_forward = 1
EOF
sudo sysctl --system
Please note, this may show an error like it did with mine. This error is traced to a default file and not our configuration file, so I would not worry about it.
Installing the Container Runtime
So we have Kubernetes installed on all our nodes, but it has nothing to really work off us. So we’ll need to install Docker. We can do this by running the following commands. (Warning, there are a fair few of them)
# Add repo and Install packages
sudo apt update
sudo apt install -y curl gnupg2 software-properties-common apt-transport-https ca-certificates
curl -fsSL https://download.docker.com/linux/ubuntu/gpg | sudo apt-key add -
sudo add-apt-repository "deb [arch=amd64] https://download.docker.com/linux/ubuntu focal stable"

sudo apt update
sudo apt install -y containerd.io docker-ce docker-ce-cli

# Create required directories
sudo mkdir -p /etc/systemd/system/docker.service.d

# Create daemon json config file
sudo tee /etc/docker/daemon.json <<EOF
{
  "exec-opts": ["native.cgroupdriver=systemd"],
  "log-driver": "json-file",
  "log-opts": {
    "max-size": "100m"
  },
  "storage-driver": "overlay2"
}
EOF

# Start and enable Services
sudo systemctl daemon-reload
sudo systemctl restart docker
sudo systemctl enable docker

Setting up the Master Node
Now that we have all three nodes with all the requirements, it’s time to start defining some roles. We’ll start with the Master node and make sure the br_netfilter module is loaded into the kernel.
lsmod | grep br_netfilter
We’ll then enable Kubelet to start with the system and pull the foundational container images.
sudo systemctl enable kubelet
sudo kubeadm config images pull
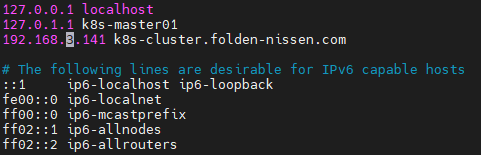
Now you will need to add the following url to the /etc/hosts file so that the initialization can take place:
<master system IP address> k8s-cluster.<your domain>
Next you will need to set up your cluster paramaters. The two important ones are:
- pod-network-cidr: this must not overlap your current network.
- control-plain-endpoint: URL to get to your local network.
I’m going to be reserving the 192.168.5.0/24 (or 192.168.5.1-255) network for my cluster, and I’ll also be setting the URL to k8s-cluster.folden-nissen.com.
sudo kubeadm init \
–pod-network-cidr=<your network> \
–control-plane-endpoint=k8s-cluster.<your domain> \
–upload-certs

Please note: After you run the command, you will see some information. Please be sure to copy the kubeadm join line and put it somewhere safe. You will need this later to join workers to the master node.
Now to be able to use kubectl from the local user, enter the following commands:
mkdir -p $HOME/.kube
sudo cp -i /etc/kubernetes/admin.conf $HOME/.kube/config
sudo chown $(id -u):$(id -g) $HOME/.kube/config
Next we’ll install the network plugin into the master node so everyone can talk together.
kubectl apply -f https://docs.projectcalico.org/manifests/calico.yamlNow we’ll make sure everything is working as expected.
kubectl cluster-info
kubectl get pods --all-namespaces
kubectl get nodes -o wide
And you are done with the master node!
Worker Bees
To start with, we’ll also need to apply the k8s-cluster entry into the /etc/hosts file of each worker node.
<master system IP address> k8s-cluster.<your domain>

Then we’ll use the kubeadm join command you copied earlier to join the workers to the cluster.
sudo kubeadm join k8s-cluster.folden-nissen.com:6443 --token <letters&numbers> \
        --discovery-token-ca-cert-hash sha256:<more letters&numbers> \
        --certificate-key <even more letters&numbers>
Note, you will need to do this on each worker node one at a time.

Once you have the process completed on all nodes, go back to your master and run the following command to ensure your cluster is up and ready!
kubectl get nodes -o wide
Installing Helm
The last thing we’ll need to do is install Helm. This is just a simple way to automate and configure Kubernetes, and is actually how the Atlassian Supported DC deployment works.
To install Helm, we just run the following script on k8s-master01:
curl https://baltocdn.com/helm/signing.asc | sudo apt-key add -
echo "deb https://baltocdn.com/helm/stable/debian/ all main" | sudo tee /etc/apt/sources.list.d/helm-stable-debian.list
sudo apt-get update
sudo apt-get install helm
And there we go! We are ready to install our Kubernetes based Jira DC Cluster next week!
So, are you excited about a new way to run DC?
I know I am! I honestly can’t wait to see it come alive next week as I finish out this tutorial/experiment.
Don’t forget, if you want to catch the next part of this tutorial as soon as it goes live, you can subscribe below to receive new posts directly to your email. You can also catch me on Facebook, Twitter, LinkedIn, and Instagram to get the latest updates from the blog. But until next time, my name is Rodney, asking, “Have you updated your Jira issues today?”

Hi Rodney,
Great post! Do you want to share your insights and experiences on Atlassian’s official community group for K8s, there are people just like you who want to know exactly what you did. And also Atlassian Dev team who build this is also quite active there.https://community.atlassian.com/t5/Atlassian-Data-Center-on/gh-p/DC_Kubernetes
LikeLike
I have considered it, However, Atlassian Community Guidelines won’t let me link to my content here, which means I would have to repost it in its entirety to their site – including pictures. Which for a how-to guide, is not an insignificant amount of work.
However, I am a member of that group, and do browse it from time to time.
LikeLike