
Well, it’s been a week. The long and short of it is that I have a lot of things going on simultaneously and didn’t have a backup article ready when last week’s post fell. Honestly, that one is still being worked on, so no details yet. 😉
I have a few updates to share about Atlassian’s response to Data Center – including a planned AMA scheduled for next week, but I’ll cover those in more detail at the end of the article.
No, today’s post is something I’ve been meaning to cover for a while. I have detailed guides on setting up Jira on Linux and Kubernetes, but I’ve never covered the topic for Windows. So let us change that today.
If I’m being honest, setting Jira up on Windows is more straightforward than either of the options I have covered so far. So why is this not the default option for most people? Well, it’s because Windows – as an OS for a service platform – is not 100% ideal. No matter if someone is logged in or not, Windows will load some infrastructure into memory for a GUI. This means you have a rudimentary memory overhead from day one before you even load any dependency services like a database.
Compare that to Linux – which can be stood up with no GUI elements even installed. In fact, this is often how I – and many others – set up the Linux servers I run. So you get more of the memory allocated to the VM usable by Jira itself.
There is also the widespread perception that Linux is somehow “more stable” than windows long-term. Now, I’m still not 100% sold on this argument. Don’t get me wrong; I’ve seen Linux uptime in the years. I even knew one guy who was so obsessed with his Linux uptime that when he had to move the system, he kept it powered on and hooked up to a backup power supply while he raced across the city to the new building. I wish I were making this up. That being said, I’ve also seen very flaky Linux systems that can’t seem to stay working more than a few weeks at best, and I’ve seen super stable Windows systems that also have uptime in years. While impressive, I start to have security concerns on either platform when they have super-long uptime. An occasional restart is needed in both Linux and Windows to bring in patches and bug fixes into the Kernel.
At the end of the day, the memory utilization argument makes me lean more towards Linux than Windows – but I fault no one for going the other way, especially if that is the platform they know best. I’ll say it again: if you choose to run Jira on Windows, that is a perfectly valid choice. So let’s get started and see what it takes to get it set up!
Basic Windows Setup
DO – just putting this out there – putting your service directories on the same drive as your Operating system is bad. So ideally, your Windows VM should have two drives – C: for your Windows Install and D: for your Service files.

Other than that, You need to make sure you have enough memory and CPU for your database and Jira install. I find around 8 GB Ram, and four vCPU for the VM is a good starting point, but more will never be amiss!

And lastly, If you are doing a Data Center Install, don’t forget that both your Database and Fileshare need to be on separate Systems from your Jira Nodes. The fileshare also needs to be accessible on the Jira Nodes. Today I will be doing a simple Server install, so we won’t need to worry about these steps.
Database
So, truth time. While I’m very familiar with setting up Jira on Windows, I’m less familiar with MySQL. So I’ll be following the installation guide listed here:
However, the install directions are “Download installer, run installer.” So I’ll be expanding on them a bit.
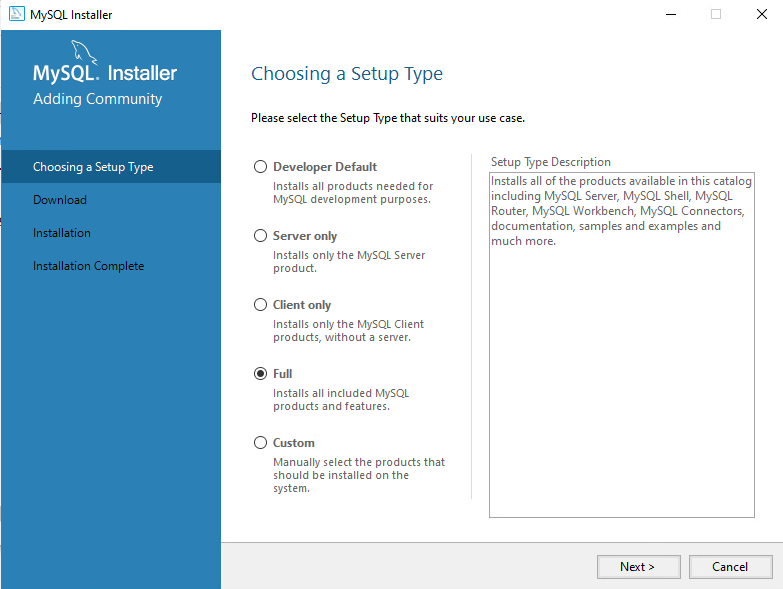
After starting the installer, we are presented with our first choice. While the “Server only” option may be tempting, having the client local on the server will greatly help with debugging, so I don’t mind having the client also on there. So I typically select the “Full” setting.
Next is the requirements check. Unfortunately, both of my warnings are manual, so I need to download and install them manually. Thankfully, clicking on each gives me a direct link for resolution!

The Visual Studio requirement I really only useful for development, which isn’t the point of this machine. So, after installing Python, I clicked next and chose to ignore the missing requirements. This brings me to the next screen:

Click “Execute” and install the packages!

Clicking “Next” will take you into some options to configure the various parts of the install.

This will take us through a wizard that Configures the Database System. On this first page for Server, I use the following settings:
- Config Type: Server Computer
- All other options are kept to the default values

We also use the default values (Strong Encryption) on the Authentication Method screen.

On the next screen, we will set up the Root Password and the various account creation. This is where we’ll go ahead and create an account that we’ll later use to access the system and create the Jira database and user.

Now we’ll set up the service that will start MySQL upon starting the Server. This is critical for coming back up as fast as possible after a server restart. You can keep the default settings though.

And now we can click execute to apply these settings.

Next, we’ll look at the MySQL Router – which I leave configured. Lastly, we’ll check our password and connection, and upon successful test, we can Finish the installation!
Setting up the Jira Database
Now that we have the MySQL service installed let’s set up the Database. We’ll start by opening the MySQL Workbench and opening the Local instance using the Root Password during the install.

I don’t like to save the Password in the vault – it just makes a hacker’s job easier.
Once we’ve logged in, we’ll follow the normal MySQL Guide to setting up the Jira Database.
Per the document, we will start by executing the following SQL commands to setup a Jira Database.
CREATE DATABASE jiradb CHARACTER SET utf8mb4 COLLATE utf8mb4_bin;
We will then go to Server -> Users and Privileges to create our Jira user. On the Login tab, enter the ‘jira’ for the Username, ‘localhost’ for the “Limit hosts to matching,” and a strong, unique password.

We’ll then go to the Schema Privileges. We will then click “Add Entry,” which will pop up a page. We’ll enter “jiradb.*” for Schemas matching Pattern, then click “OK.” This will take us back to the previous screen. There, we’ll select the checkboxes for “SELECT”, “INSERT”, “UPDATE”, “DELETE”, “CREATE”, “DROP”, “REFERENCES”, “ALTER”, and “INDEX.”

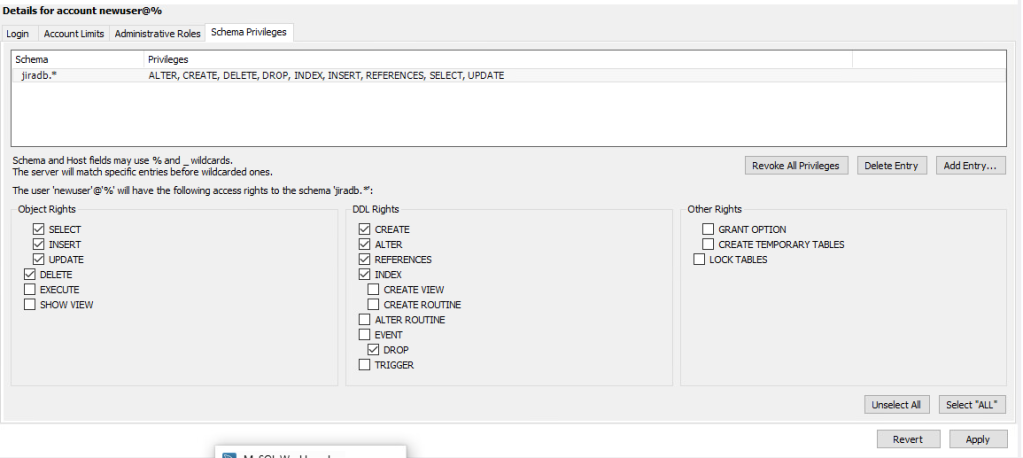
Now we can click “Apply.” And our account is created and ready for Jira!
Next, we need to configure the MySQL Server with some settings. Open up your file browser, and enter “%PROGRAMDATA%\MySQL\MySQL Server 8.0\” into the address bar. Now open the my.ini file in your preferred text editor.
We’ll modify the following settings:
character_set_server=utf8mb4
innodb_log_file_size=2G
Furthermore, we’ll add the following settings to the file.
innodb_default_row_format=DYNAMICWe’ll then restart the MySQL service via the Windows Service Manager.

And with that, our database is ready, and we can move on to the Jira install!
Jira Installer
Given Atlassain’s recent attitudes towards On-Prem instances, It can be rather difficult to find the download links for the instances. However, you have me on your side, who is more than happy list it
I typically go through this flow:
Upgrade to latest Release -> Server -> Long Term Support -> Windows 64 Bit
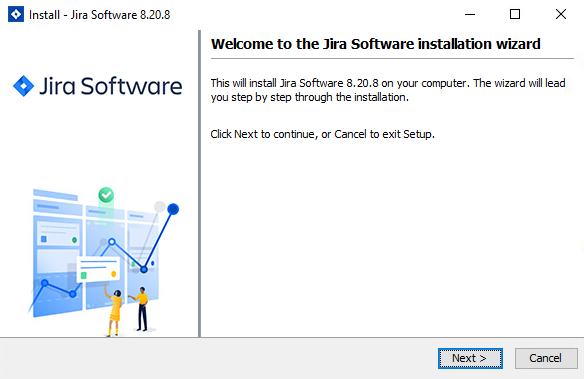
You can then click the “I agree” Checkmark and download the Installer. You can then right-click, and click “Run as Administrator.”
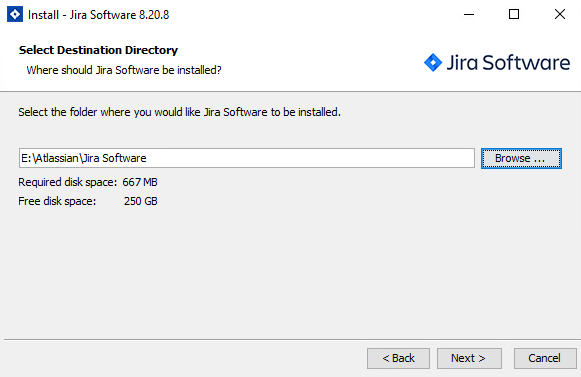
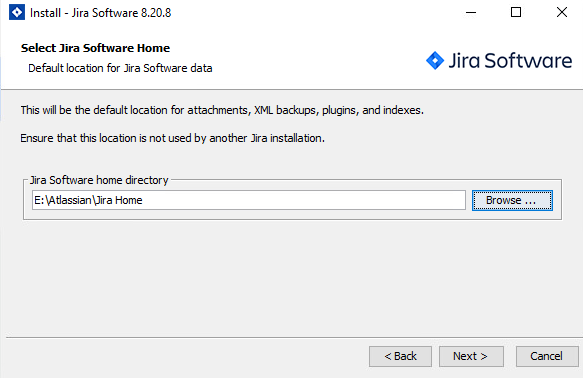
After clicking on “Next,” we are given a choice between “Express install” or “Custom install.” We will be doing a custom install. We will then move the Install directory from its default to our Service Drive. I like to put it in an “Atlassian” subfolder, just for organization’s sake. This is the same as an Install directory on Linux and should be in the local drive and note a remote share.
Next, we’ll do the same for the Home directory. putting it in a separate directory than the Install.
The next screen configures the Start Menu settings – which can be useful for starting, stopping, and restarting the service. We’ll be keeping the default settings here.

We’ll keep the default ports as well, so we can click next on the next screen.

We will be installing the Service as well. So we can click “Next” after confirming the check box is checked.

The last option screen is just confirming all the settings. If you are happy, click install!


After the installer finishes, we’ll Uncheck “Start Jira now” and click “Finish.” We have one final step to do before we start Jira, after all!

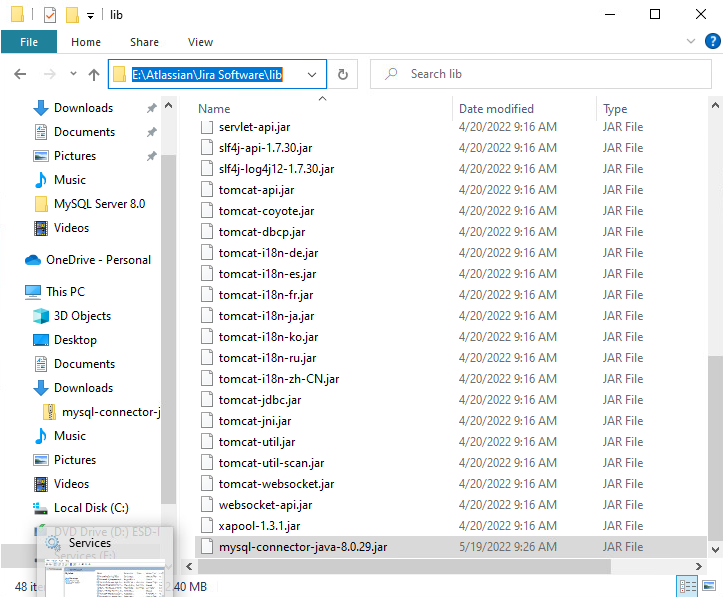
We’ll download the MySQL Driver JDBC Connector. For windows, I’ll download the platform Independent Zip package, then extract the jar file. I’ll then place the jar file to the <jira-installation-directory>/lib (for me, this is E:\Atlassian\Jira Software\lib folder).
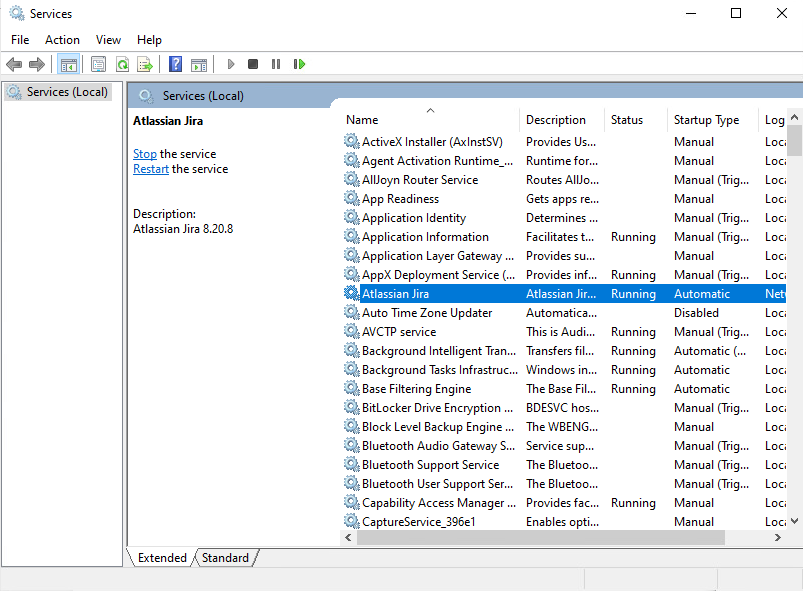
We can now start up Jira from the start menu, or by finding “Atlassian Jira” in the Service Manager.

After it starts up, we can load up Jira from the browser by going to “HTTP://localhost:8080” From here, it is your normal setup! Congrats, you have Jira on Windows!

So, what’s been going on?
So – the past few weeks have not been ideal. I’ve had a few different stressors as of late – the least of which is this baby girl that’s not been feeling herself. I had to take her to the vet yesterday, so I didn’t have the time to do this particular post justice.

I’m hoping to return to my normal posting schedule next week.
In speaking of next week, Next Wednesday, May 25th, 2022, Atlassian will be holding their promised AMA. This is your chance to ask Atlassian directly about Data Center and its plans. I hope you will all add your questions and concerns!
As always, you can find my social media links via my Linktree. Please share, like, and comment, as this is the best way to let others know about the blog! You can also subscribe directly to the blog below, which will send you an email whenever I have a new post!
But until next time, my name is Rodney, asking, “Have you updated your Jira issues today?”

Hey Rodney, this is an incredibly good guide, amazingly simple and straightforward, as I like them.
Doing installation on windows recently ì did have some problems by running installer as an administrator. While launching Jira it does not have access to all files which result on error at start. I did install it with my current user to do the trick, but I think I’m missing the point on starting Jira. Do you do something special to do this?
I also read here and there that creating a dedicated user for Jira is a good practice we should try to follow every time possible. Is it something we must do on Windows? If yes, I would kill to have the updated version of this guide!
This is my very first comment and I wish to thank you for all the good content. I always find real killing tips on this blog!
Keep up!
Signed : Another community leader aspiring to get more confidence on Jira and Atlassian.
LikeLike
Unfortunately, my specialty is Linux, so I’m not as familiar with the nuances of WIndows permissions as I would hope to be.
In general, it is preferred to run Jira as a dedicated user. However, you will need to ensure that the user has access to the folder and all subordinate directories and files.
You can do this by going to the Security tab of the folder, clicking “Edit”, then adding the user to the upper panel and making sure “Full control” is checked in the lower panel when their user is highlighted.
LikeLike
OH and one more question, you talk about installing Jira server but it’s currently impossible to generate a licence key even for evaluation. I personally use timebomb licence but it’s not that perfect TBH. How do you get a valid software in server in this time of hate for server product?
LikeLike
Unfortunately, Atlassian has stopped all New Server license sales as of February of this year. So right now, you cannot do so legally.
LikeLike
Can you please explain the procedure of how to change the “locahost” url to any live url and also SMTP setup,
LikeLike