
So, dear readers, here’s the deal. Some weeks, when I sit down to write, I know exactly what I’m going to write about, and can get right to it. Other weeks, I’m sitting down, and I don’t have a clue. I can usually figure something out, but it’s very much a struggle. This week is VERY much the latter.
Compound that with the fact that I just lost most of my VM’s due to a storage failure I had this very morning. Part of it was a mistake on my part. I have the home lab so that I can learn things I can’t learn on the job. And mistakes are a painful but powerful way to learn. Still….

This brings me back to a conversation I had with a colleague and fellow Atlassian Administrator for a company I used to work for. He had asked me what my thoughts around implementing Monitoring of JIRA. Well, I have touched on the subject before, but if I’m being honest, this isn’t my greatest work. Combine that with the fact that I suddenly need to rebuild EVERYTHING, well, why not start with my monitoring stack!
So, we are going to be setting up a number of systems. To gather system stats, that is to say CPU usage, Memory Usage, and Disk usage, we are going to be using Telegraf, which will be storing that data in an InfluxDB database. Then for JIRA stats we are going to use Prometheus. And to query and display this information, we will be using Grafana.
The Setup
So we are going to be setting up a new system that will live alongside our JIRA instance. We will call it Grafana, as that will be the front end we will interact with the system with.
On the back end it will be running both a InfluxDB Server and a Prometheus Server. Grafana will use both InfluxDB and Prometheus as data sources, and will use that to generate stats and graphs of all the relevant information.
Our system will be a CentOS 7 system (my favorite currently), and will have the following stats:
- 2 vCPU
- 4 GB RAM
- 16 GB Root HDD for OS
- 50 GB Secondary HDD for Services
This will give us the ability to scale up the capacity for services to store files without too much impact on the overall system, as well as monitor it’s size as well.
As per normal, I am going to write all commands out assuming you are root. If you are not, I’m also assuming you know what sudo is and how to use it, so I won’t insult you by holding your hand with that.
InfluxDB
Lets get started with InfluxDB. First thing we’ll need to do is add the yum repo from Influxdata onto the system. This will allow us to use yum to do the heavy lifting in the install of this service.
So lets open /etc/yum.repos.d/influxdb.repo
vim /etc/yum.repos.d/influxdb.repoAnd add the following to it:
[influxdb]
name = InfluxDB Repository - RHEL \$releasever
baseurl = https://repos.influxdata.com/rhel/\$releasever/\$basearch/stable
enabled = 1
gpgcheck = 1
gpgkey = https://repos.influxdata.com/influxdb.key
Now we can install InfluxDB
yum install influxdb -y
And really, that’s it for the install. Kind of wish Atlassian did this kind of thing.
We’ll need to of course allow firewall access to Telegraf can get data into InfluxDB.
firewall-cmd --permanent --zone=public --add-port=8086/tcp
firewall-cmd --reload
And with that we’ll start and enable the service so that we can actually do the service setup.
systemctl start influxdb
systemctl enable influxdb
Now we need to set some credentials. As initially setup, the system isn’t really all that secure. So we are going to secure it initially by using curl to set ourselves an account.
curl -XPOST "http://localhost:8086/query" --data-urlencode \
"q=CREATE USER username WITH PASSWORD 'strongpassword' WITH ALL PRIVILEGES"
I shouldn’t have to say this, but you should replace username with one you can remember and strongpassword with, well, a strong password.
Now we can use the command “influx” to get into InfluxDB and do any further set up we need.
influx -username 'username' -password 'password'
Now that we are in, we need to setup a database and user for our JIRA data to go into. As a rule of thumb, I like to have one DB per application and/or system I intend to monitor with InfluxDB.
CREATE DATABASE Jira
CREATE USER jira WITH PASSWORD 'strongpassword'
GRANT ALL ON jira TO jira
CREATE RETENTION POLICY one_year ON Jira DURATION 365d REPLICATION 1 DEFAULT
SHOW RETENTION POLICIES ON Jira

And that’s it, InfluxDB is ready to go!
Grafana
Now that we have at least one datasource, we can get to setting up the Front End. Unfortunately, we’ll need information from JIRA in order to setup Prometheus (once we’ve set JIRA up to use the Prometheus Exporter), so that data source will need to wait.
Fortunately, Grafana can also be setup using a Yum repo. So lets open up /etc/yum.repos.d/grafana.repo
vim /etc/yum.repos.d/grafana.repoand add the following:
[grafana]
name=grafana
baseurl=https://packages.grafana.com/oss/rpm
repo_gpgcheck=1
enabled=1
gpgcheck=1
gpgkey=https://packages.grafana.com/gpg.key
sslverify=1
sslcacert=/etc/pki/tls/certs/ca-bundle.crt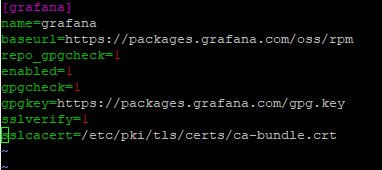
Afterwards, we just run the yum install command:
sudo yum install grafana -yGrafana defaults to port 3000, however options to change or proxy this are available. However, we will need to open port 3000 on the firewall.
firewall-cmd --permanent --zone=public --add-port=3000/tcp
firewall-cmd --reload
Then we start and enable it:
sudo systemctl start grafana-server
sudo systemctl enable grafana-server
Go to port 3000 of the system on your web browser and you should see it up and running. We’ll hold off on setting up everything else on Grafana until we finish the system setup, though.

Telegraf
Telegraf is the tool we will use to get our data from JIRA’s underlying linux system and into InfluxDB. This is actually part of the same YUM repo that InfluxDB is installed from, so we’ll now also add it to the JIRA server – same as we did Grafana.
vim /etc/yum.repos.d/influxdb.repoAnd add the following to it:
[influxdb]
name = InfluxDB Repository - RHEL \$releasever
baseurl = https://repos.influxdata.com/rhel/\$releasever/\$basearch/stable
enabled = 1
gpgcheck = 1
gpgkey = https://repos.influxdata.com/influxdb.key
And now that it has the YUM repo, we’ll install telegraf onto the JIRA Server.
yum install telegraf -y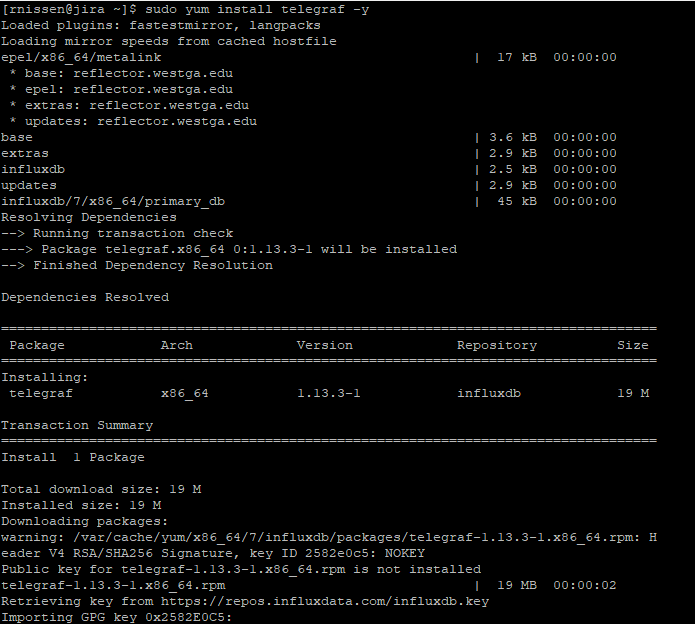
Now that we have it installed, we can take a look at it’s configuration, which you can find in /etc/telegraf/telegraf.conf. I highly suggest you take a backup of this file first. Here is an example of a config file where I’ve filtered out all the comments and added back in everything essential.
[global_tags]
[agent]
  interval = "10s"
  round_interval = true
  metric_batch_size = 1000
  metric_buffer_limit = 10000
  collection_jitter = "0s"
  flush_interval = "10s"
  flush_jitter = "0s"
  precision = ""
  logtarget = "file"
  logfile = "/var/log/telegraf/telegraf.log"
  logfile_rotation_interval = "1d"
  logfile_rotation_max_size = "500MB"
  logfile_rotation_max_archives = 3
  hostname = "<JIRA's Hostname>"
  omit_hostname = false
[[outputs.influxdb]]
  urls = ["http://<grafana's url>:8086"]
  database = "Jira"
  username = "jira"
  password = "<password from InfluxDB JIRA Database setup>"
[[inputs.cpu]]
  percpu = true
  totalcpu = true
  collect_cpu_time = false
  report_active = false
[[inputs.disk]]
  ignore_fs = ["tmpfs", "devtmpfs", "devfs", "iso9660", "overlay", "aufs", "squashfs"]
[[inputs.diskio]]
[[inputs.kernel]]
[[inputs.mem]]
[[inputs.processes]]
[[inputs.swap]]
[[inputs.system]]

And that should be it for config. There are of course more we can capture using various plugins – based on whatever we are interested in, but this will get the bare minimum we are interested in.
Because telegraf is pushing data to the InfluxDB server, we don’t need to open any firewall ports for this, which means we can start it, then monitor the logs to make sure it is sending the data over without any problems.
systemctl start telegraf
systemctl enable telegraf
tail -f /var/log/telegraf/telegraf.log
And assuming you don’t see any errors here, you are good to go! We will have the stats waiting for us when you finish the setup of Grafana. But first….
Prometheus Exporter
So telegraf is great for getting the Linux system stats, but that only gives us a partial picture. We can train it to capture JMX info, but that means we have to setup JMX – something I’m keen to avoid whenever possible. So what options have we got to capture details like JIRA usage, JAVA Heap performance, etc?
Ladies and gentlemen, the Prometheus Exporter!

That’s right, as of the time of this writing, this is yet another free app! This will setup a special page that Prometheus can go to and “scrape” the data from. This is what will take our monitoring from “okay” to “Woah”.
Because it is a free app, we can install it directly from the “Manage Apps” section of the JIRA Administration console

Once you click install, click “Accept & Install” on the pop up, and it’s done! After a refresh, you should notice a new sidebar item called “Prometheus Exporter Settings”. Click that, then click “Generate” next to the token field.
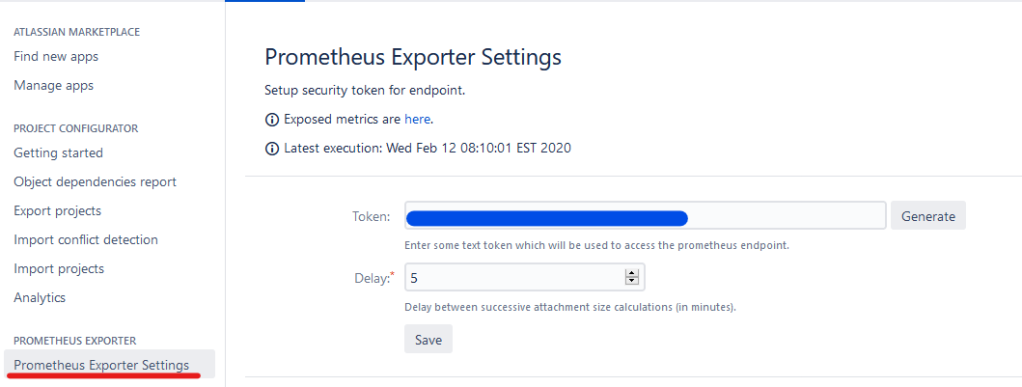
Next we’ll need to open the “here” link into a new tab on the “Exposed metrics are here” text. Take special special note of the URL used, as we’ll need this to setup Prometheus.

Prometheus
Now we’ll go back to our Grafana system to setup Prometheus. To find the download, we’ll go to the Prometheus Download Page, and find the latest Linux 64 bit version.
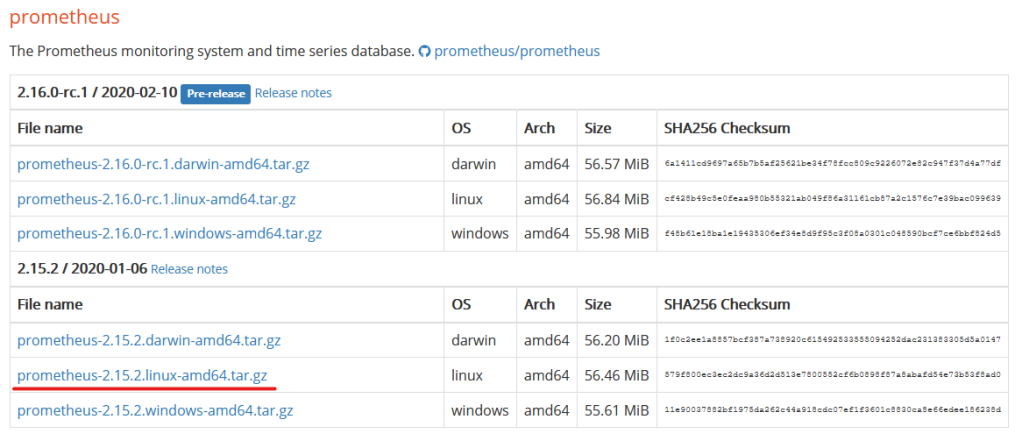
Copy that to your clipboard, then download it to your Grafana system.
wget https://github.com/prometheus/prometheus/releases/download/v2.15.2/prometheus-2.15.2.linux-amd64.tar.gzNext we’ll need to unpack it and move it into it’s proper place.
tar -xzvf prometheus-2.15.2.linux-amd64.tar.gz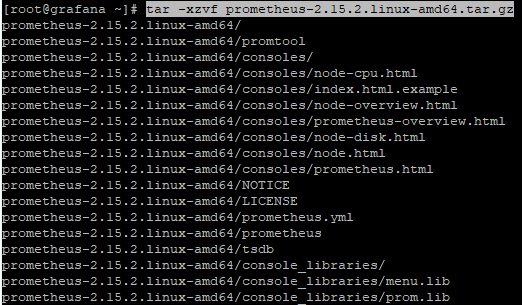
mv prometheus-2.15.2.linux-amd64 /archive/prometheus
Now if we go into the prometheus folder, we will see a normal assortment of files, but the one we are interested in is prometheus.yml. This is our config file and where we are interested in working. As always, take a backup of the original file, then open it with:
vim /archive/prometheus/prometheus.ymlHere we will be adding a new “job” to the bottom of the config. You can copy this config and modify it for your purposes. Note we are using the URL we got from the Prometheus Exporter. The first part of the URL (everything up to the first slash, or the FQDN) goes under target where indicated. The rest of the URL (folder path) goes under metrics_path. And then your token goes where indicated so that you can secure these metrics.
global:
  scrape_interval:     15s
  evaluation_interval: 15s
alerting:
  alertmanagers:
  - static_configs:
    - targets:
rule_files:
scrape_configs:
  - job_name: 'prometheus'
    static_configs:
    - targets: ['localhost:9090']
  - job_name: 'Jira'
    scheme: https
    metrics_path: '<everything after the slash>'
    params:
      token: ['<token from Prometheus exporter']
    static_configs:
    - targets:
      - <first part of JIRA URL, everything before the first '/'>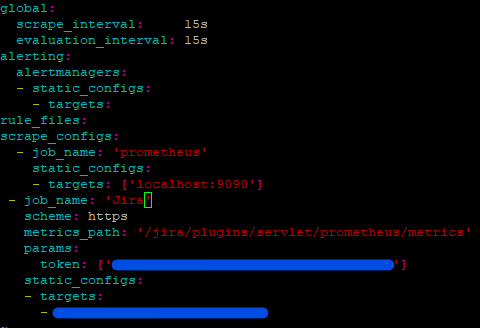
We’ll need to now open up the firewall port for Prometheus
firewall-cmd --permanent --zone=public --add-port=9090/tcp
firewall-cmd --reload
Now we can test Prometheus. from the prometheus folder, run the following command.
./prometheus --config.file=prometheus.yml
From here we can open a web browser, and point it to our Grafana server on port 9090. On the Menu, we can go to Status -> Targets and see that both the local monitoring and JIRA are online.

Go ahead and stop prometheus for now by hitting “Ctrl + C”. We’ll need to set this up as a service so that we can rely on it coming up on it’s own should we ever have to restart the Grafana server.
Start by creating a unique user for this service. We’ll be using the options “–no-create-home” and “–shell /bin/false” to tell linux this is an account that shouldn’t be allowed to login to the server.
useradd --no-create-home --shell /bin/false prometheusNow we’ll change the files to be owned by this new prometheus account. Note that the -R makes chown run recursively, meaning it will change it for every file underneath were we run it. Stop and make sure you are running it from the correct directory. If you run this command from the root directory, you will have a bad day (Trust me)!
chown -R prometheus:prometheus ./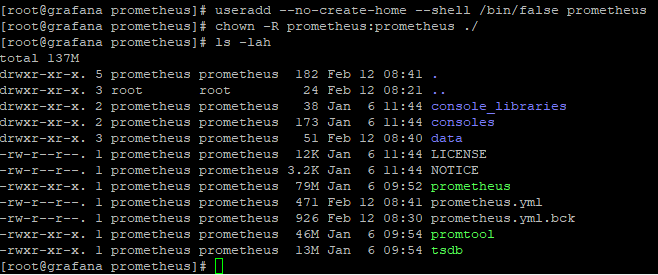
And now we can create it’s service file.
vim /etc/systemd/system/prometheus.serviceInside the file we’ll place the following:
[Unit]
Description=Prometheus
Wants=network-online.target
After=network-online.target

[Service]
User=prometheus
Group=prometheus
Type=simple
ExecStart=/archive/prometheus/prometheus \
    --config.file /archive/prometheus/prometheus.yml \
    --storage.tsdb.path /archive/prometheus/ \
    --web.console.templates=/archive/prometheus/consoles \
    --web.console.libraries=/archive/prometheus/console_libraries

[Install]
WantedBy=multi-user.target
After you save this file, type the following commands to reload systemctl, start the service, make sure it’s running, then enable it for launch on boot.:
systemctl daemon-reload
systemctl start prometheus
systemctl status prometheus
systemctl enable prometheus
Now just double check that the service is in fact running, and you’re good to go!
Grafana, the Reckoning
Now that we have both our datasources up and gathering information, we need to start by creating a way to display it. On your web browser, go back to Grafana, port 3000. You should be greeted with the same login screen as before. To login the first time, use ‘admin’ as username and password.
You will be prompted immediately to change this password. Do so. No – really.
After you change your password, you should see the screen below. Clilck “Add data source”

We’ll select InfluxDB from the list as our first Data Source.

For settings, we’ll enter only the following:
- Name: JIRA
- URL: http://localhost:8086
- Database: Jira
- User: jira
- Password: Whatever you set the InfluxDB Jira password to be
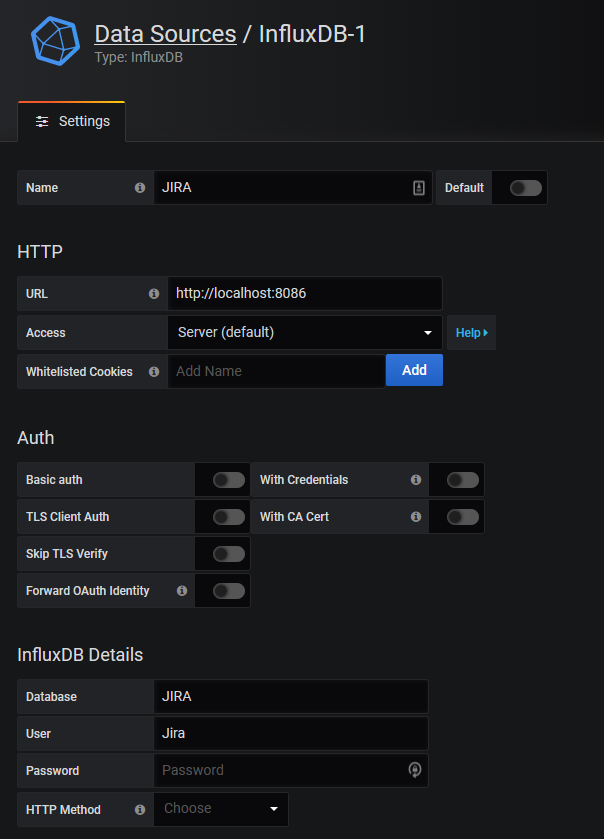
Click “Save & Test” at the bottom and you should have the first one down. Now click “Back” so we can set up Prometheus.
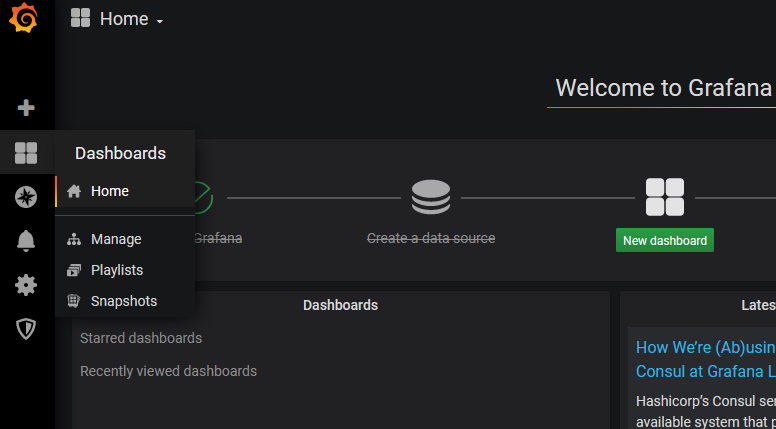
On Prometheus, all we’ll need to do is set the URL to be “http://localhost:9090. Enter that, then click “Save & Test”. And that’s both Data Sources done! Now we can move onto the Dashboard. On the right sidebar, click through to “Home”, then click “New Dashboard”
And now you are ready to start visualizing Data. I’ve already covered some Dashboard tricks in my previous attempt at this topic. However, if it helps, here’s how I used Prometheus to setup a graph of the JVM Heap.

Some Notes
Now, there is some cleanup you can do here. You can map out the storage for Grafana and InfluxDB to go to your /archive drive, for example. However, I can’t be giving away *ALL* the secrets ;). I want to challenge you there to see if you can learn to do it yourself.
We do have a few scaling options here too. For one, we can split Influx, Prometheus, and Grafana onto their own systems. However, my experience has been that this isn’t usually necessary, and they can all live comfortably on one system.
And one final note. The Prometheus exporter, strictly speaking, isn’t JIRA Data Center compatible. It will run however. As best I can tell, it will give you the stats for each node where applicable, and the overall stats where that makes sense. It might be worth installing and setting up Prometheus to bypass the load balancer and do each node individually.
But seriously, that’s it?
Indeed it is! This one is probably one of my longer posts, so thank you for making it to the end. It’s been a great week hearing how the blog is helping people out in their work, so keep it up! I’ll do my part here to keep providing you content.
On that note, this post was a reader-requested topic. I’m always happy to take on a challenge from readers, so if you have something you’d like to hear about, let me know!
One thing that I’m working on is to try and make it easier for you to be notified about new blog posts. As such, I’ve included an email subscription form at the bottom of the blog. If you want to be notified automatically about to blog posts, enter your email and hit subscribe!
And don’t forget about the Atlassian Discord chat – thoroughly unofficial. click here to join: https://discord.gg/mXuRsVu
But until next time, my name is Rodney, asking “Have you updated your JIRA issues today?”

2 Comments